
Table of Contents
ToggleWebsite Setup
Your website setup is complete. We have shared the information listed below via email:
- Your Domain
- UserName
- Password
Login to Your Website
Please follow the instructions below and login into the website before the Website Designing class.
- Check the two URLs given below:
- YourDomain -> This URL will take you to the front end of your website. (Eg: https://imarticus.purple-brick.com/ )
- YourDomain/wp-admin -> This will take you to the backend of your website. (Eg: https://imarticus.purple-brick.com/wp-admin)
- Login to your website’s backend
- Goto YourDomain/wp-admin, Add the username and password (shared via email) in the respective fields and click on Login.
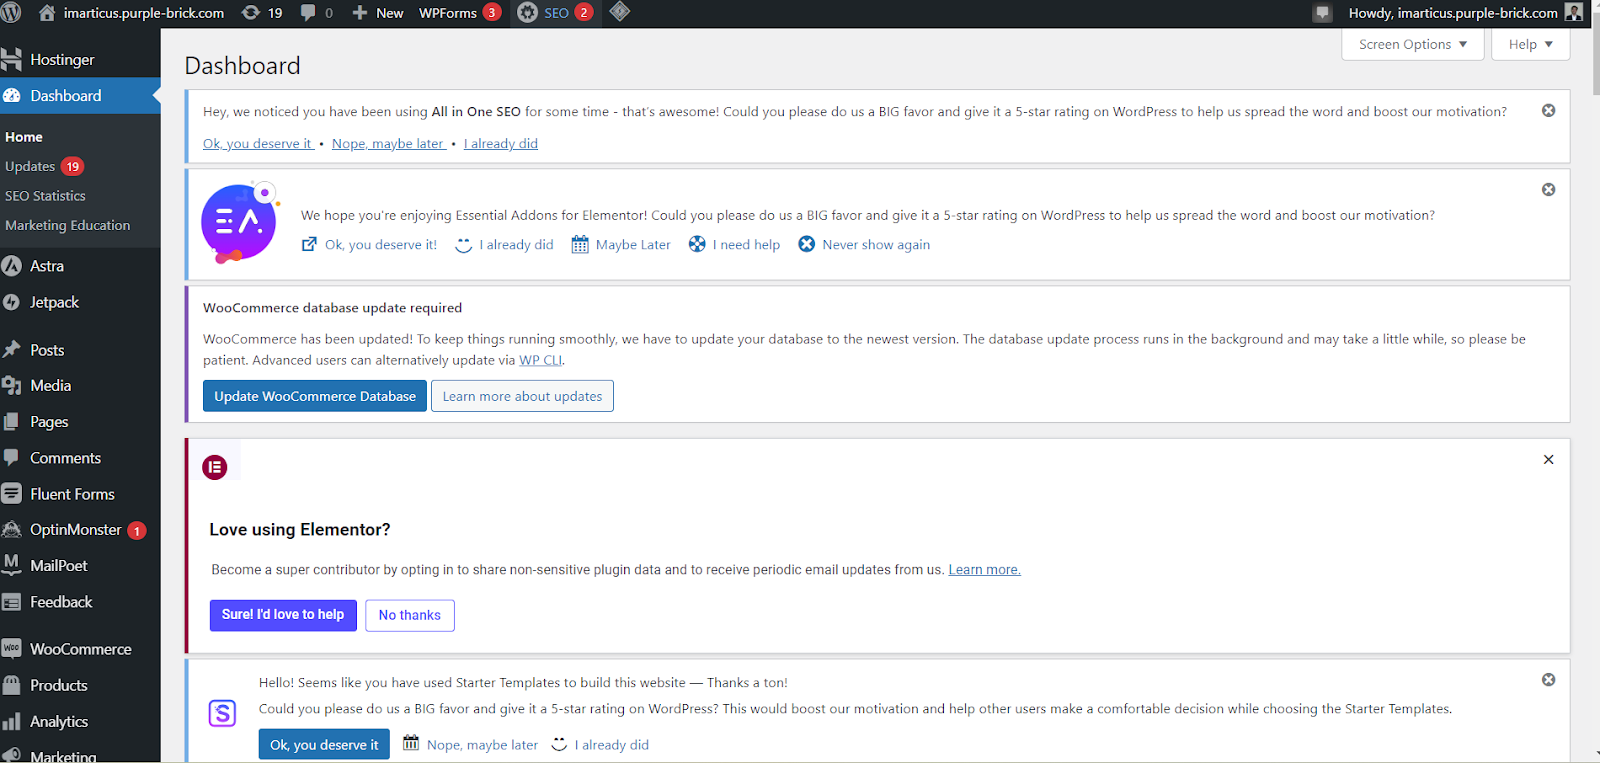
- You will see an image of your WordPress dashboard which will look like the image attached.
If you do not have credentials, please email to learn@thepurplebrick.com
*People who have their own websites have been provided with another website on which they can login. This is done so that they can follow the process during the class.
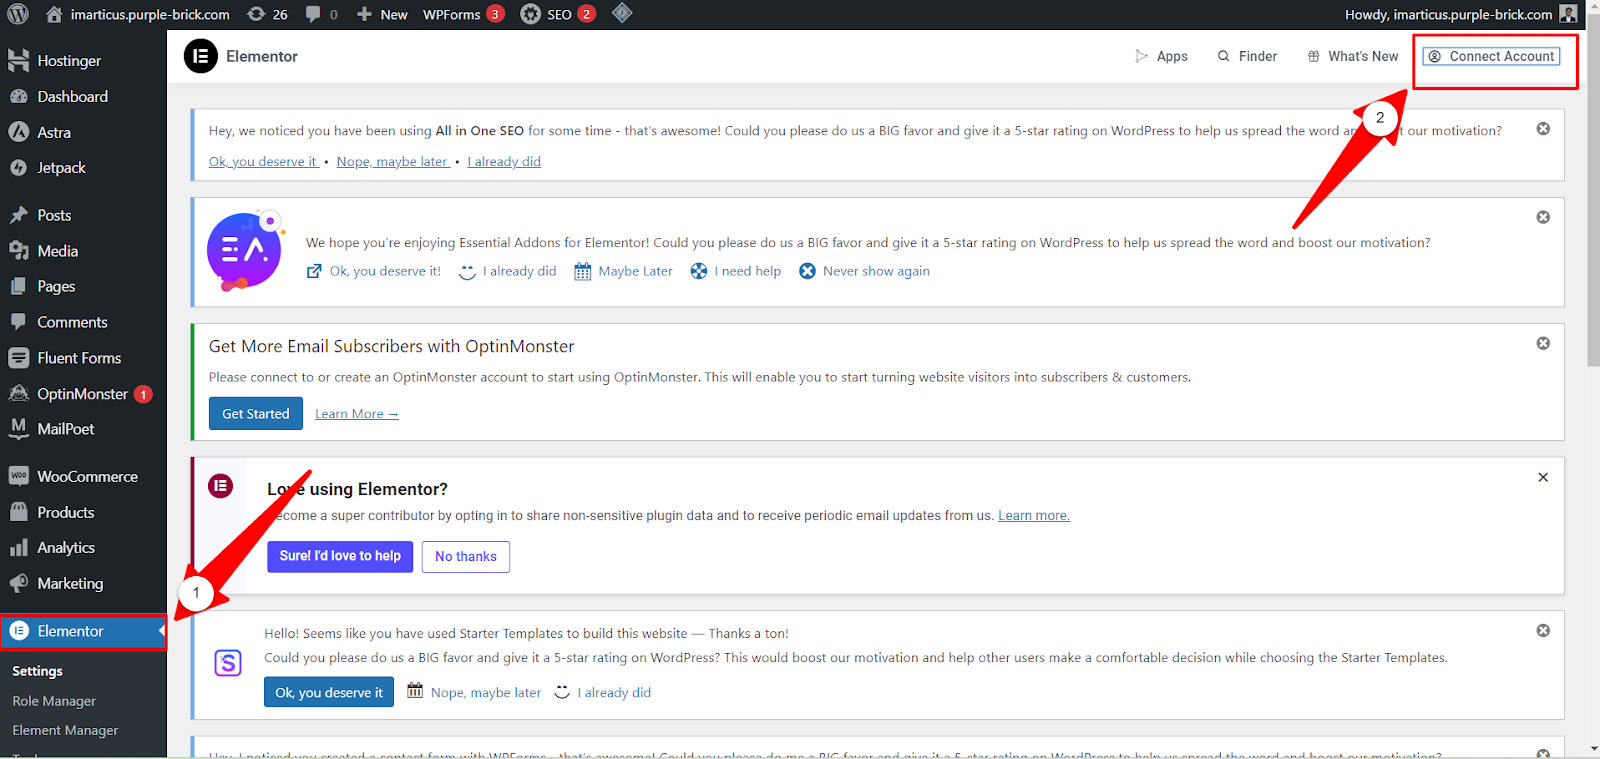
Create an Account on Elementor
- You can find the Elementor tool option in the window’s left panel. Click on it.
- In the top right corner of the screen, you’ll find the ‘Connect My Account’ option. Click on it to proceed.
Create a New Account on Templately
- Go to the Templately in your WordPress admin dashboard.
- Look for any account-related settings or options.
- There might be an option to log out/unlink my account from your Templately account. Click on it to logout/unlink my account.
After signing out you have to create a new account on templately.
- Go to the Sign up button from the top right side.
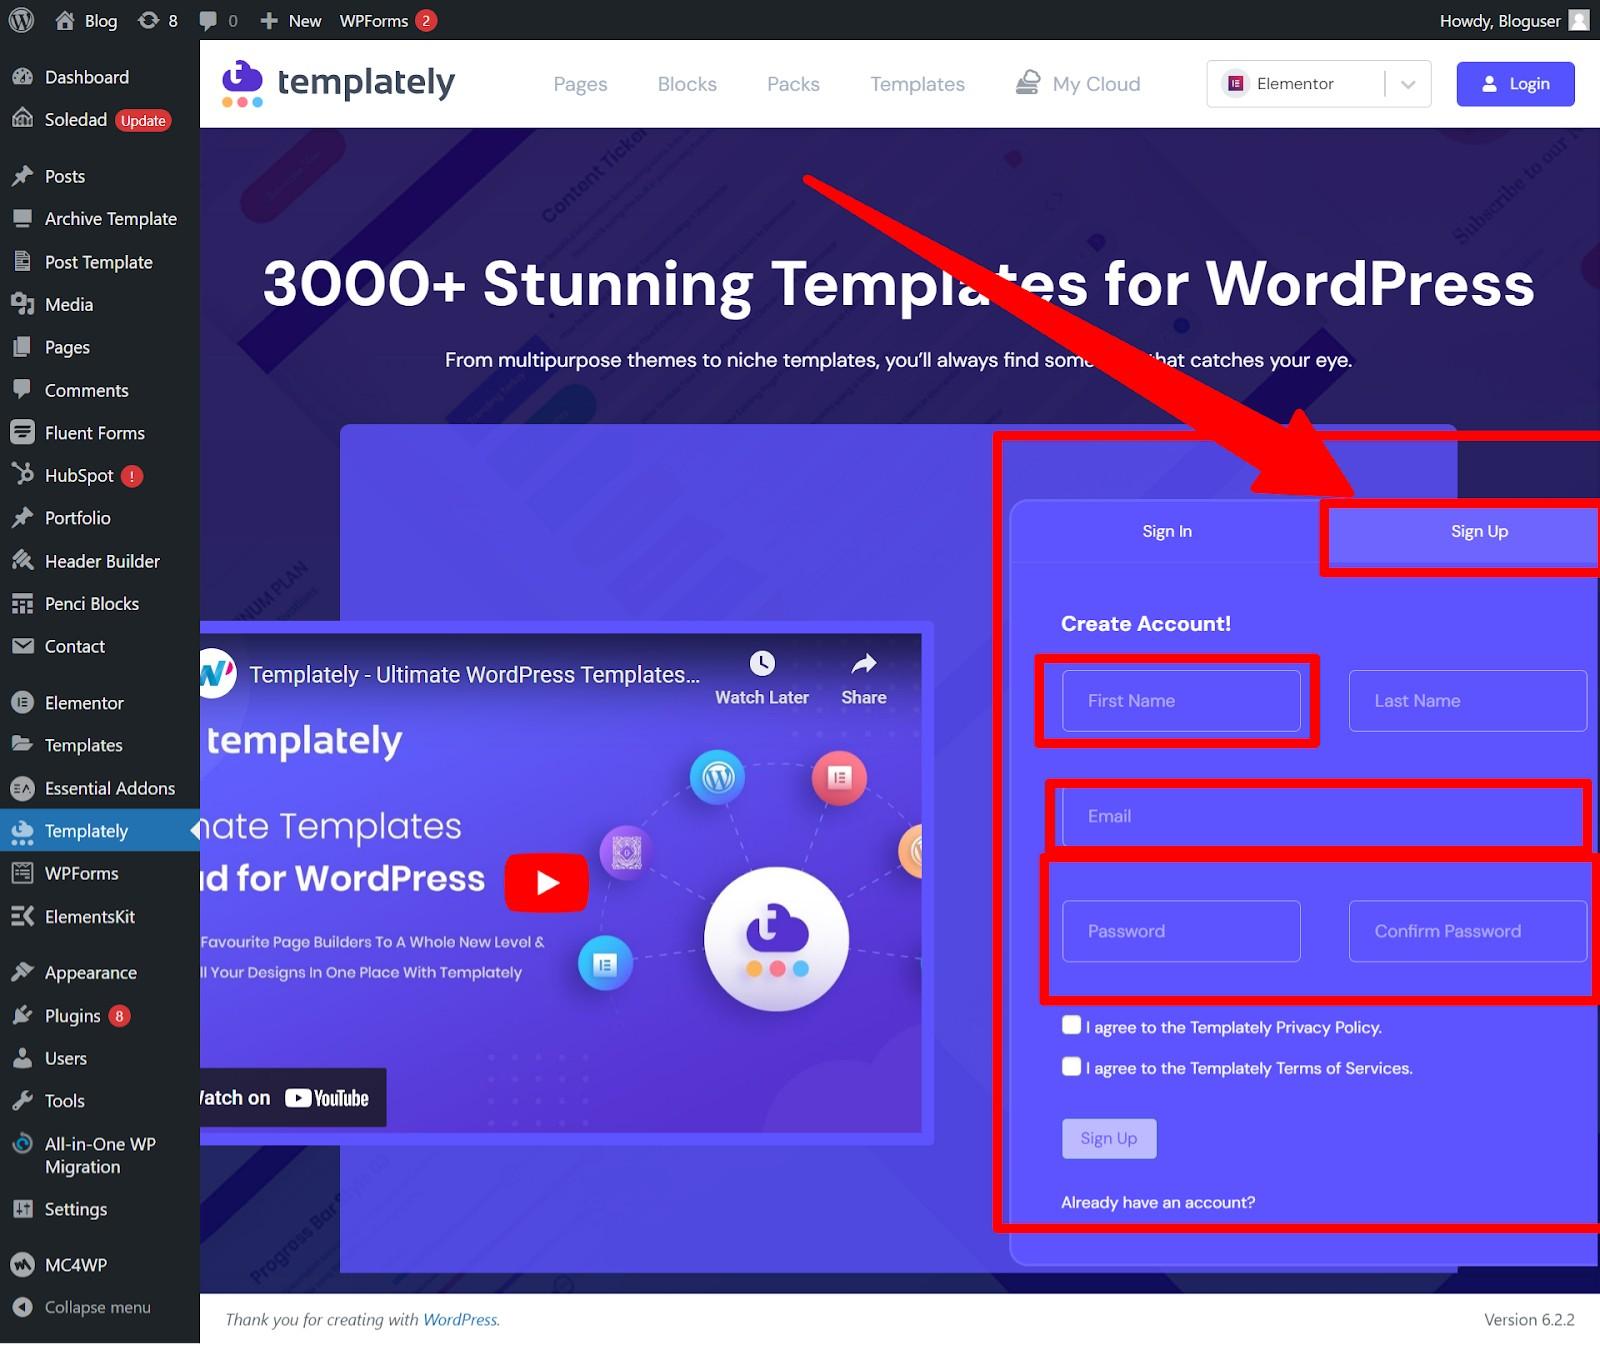
2. Fill in all the necessary fields. After that, you will get a verification mail that you need to verify from your email inbox.
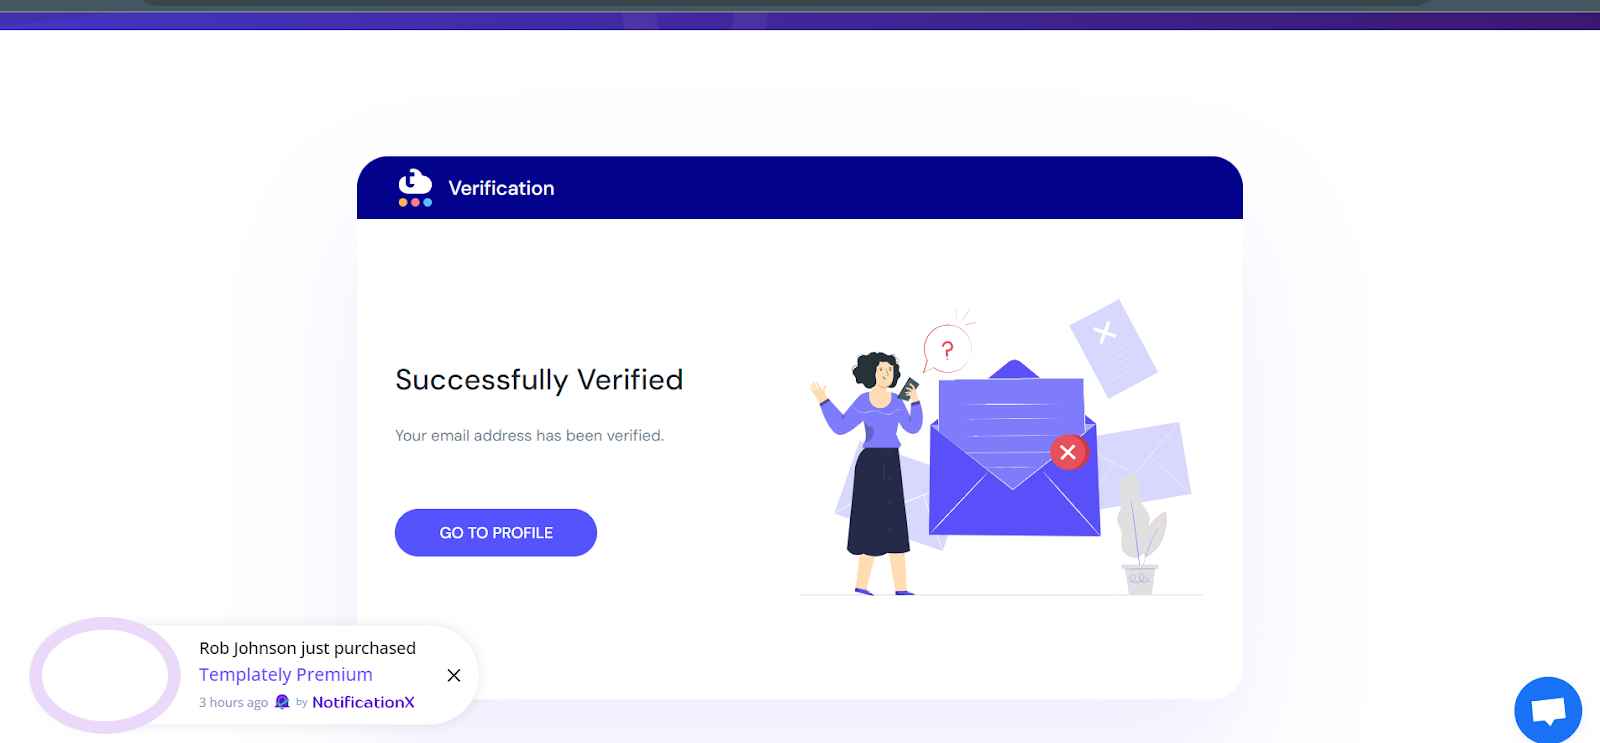
3. You have successfully created an account on Templately.
4. After verification you will be redirected to the success page (refer to the screenshot below).
***Important Note
When importing the template from the template please check the dependency of the Element before inserting it as it may not get added to the page until the dependency is installed (Dependencies are generally required plugins needed for the element to be added ).
Canva
How to create an account on Canva:
1. Visit the Canva website by typing “www.canva.com” in your web browser’s address bar and press Enter.

2. Sign Up:
- Click on the “Sign Up” button at the homepage’s top right corner.
- You can sign up using your Google account (Preferred over others) or Facebook account or by entering your email address. Choose your preferred method.
Note*: Use a separate mail for Canva that isn’t linked to any other digital assets.

3. That’s it! You’ve successfully created your Canva account.
Google Ads
Create “Google Ads” Account
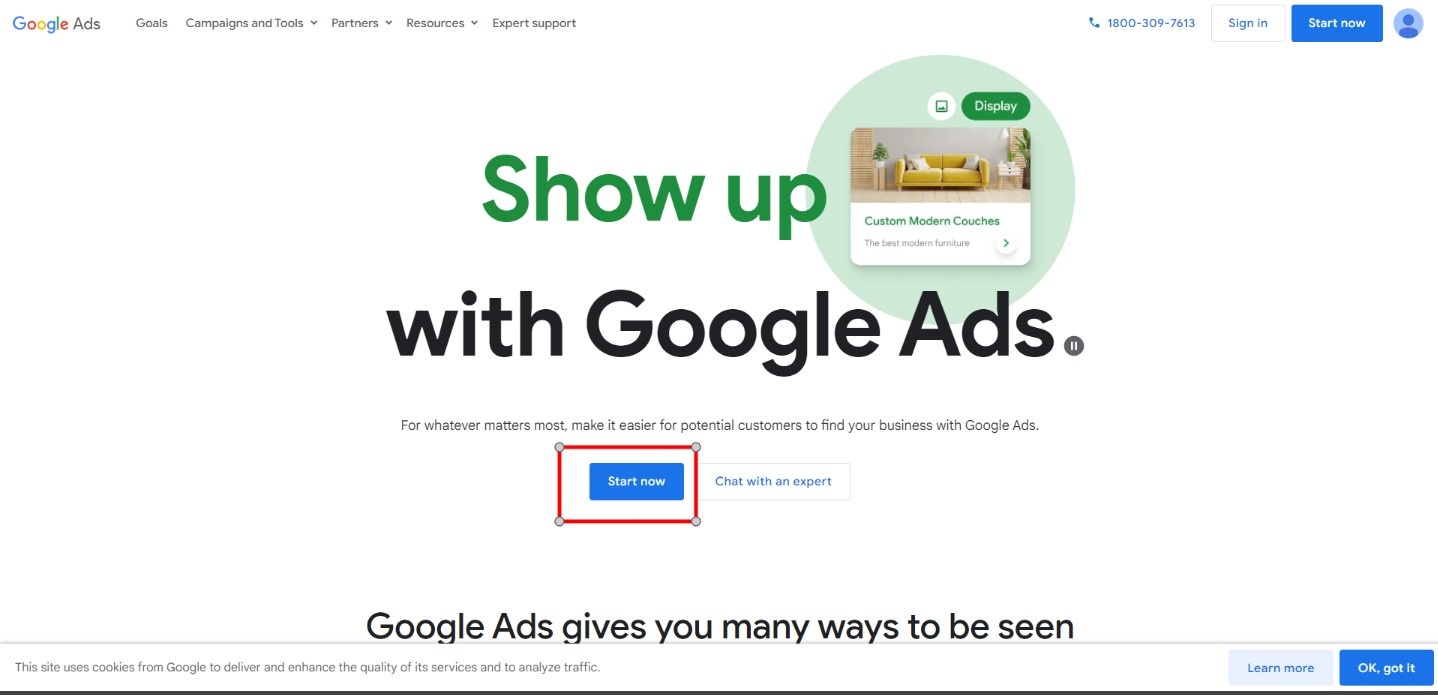
- Login to Google account and go to https://ads.google.com/home/
- Click “Start now” given below.
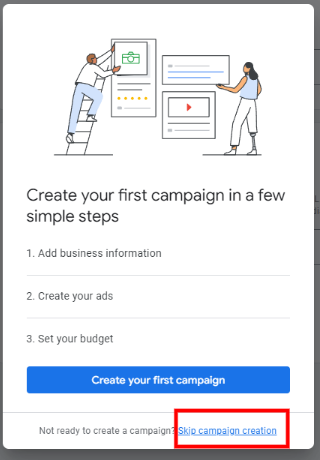
- Google will immediately take you to the first step of setting up a Smart campaign. You don’t need to do this!
In some Google Ads accounts, you find the option to “Skip Campaign Creation” Click “ Skip Campaign creation”
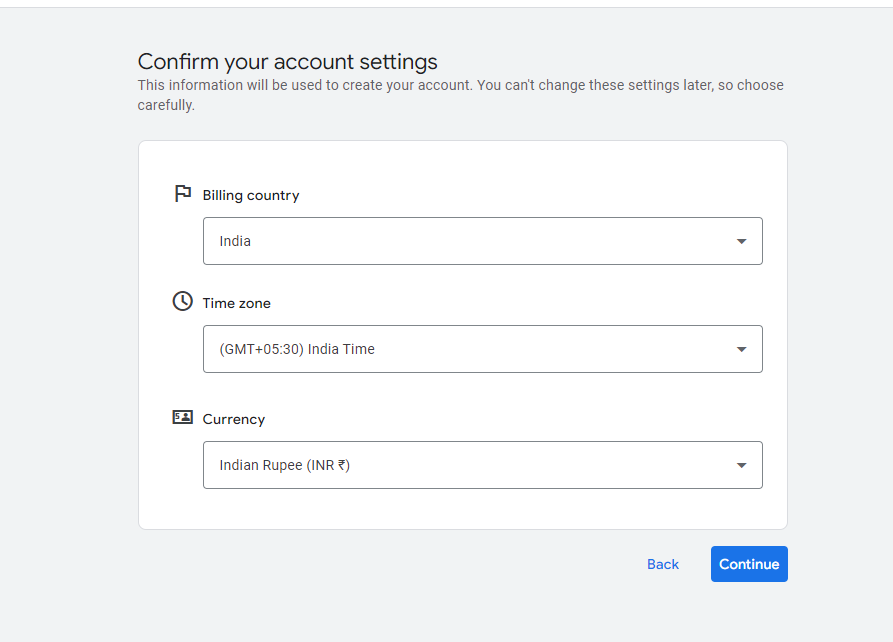
4. Now select business billing information…(Select “India” as “Billing Country”, “(GMT+5:30) india time” as “Time Zone” and “Indian Rupee” as “Currency”) and then click “No” then the “Submit” button.
Note: Fill the information correctly as this can’t be changed later
5. Now you will see another screen shown below.
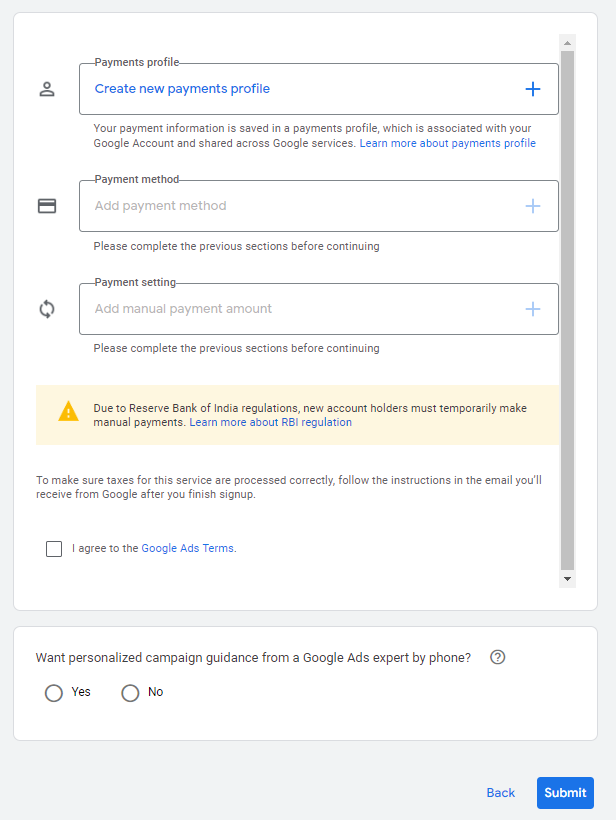
6. Click on the “Create New Payment Profile” option which has been shown above.
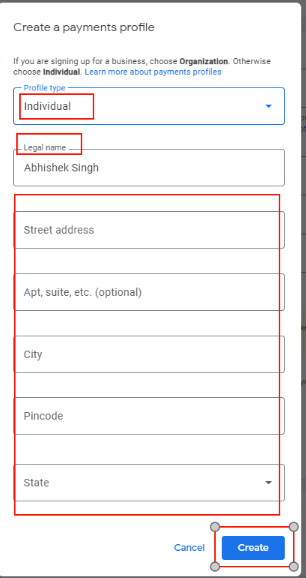
A new pop-up box will appear. Add all the necessary details: Profile type as “Individual”, Name, and Address. Then, click on the “Create” button.
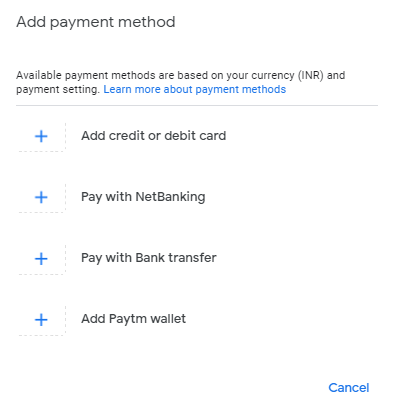
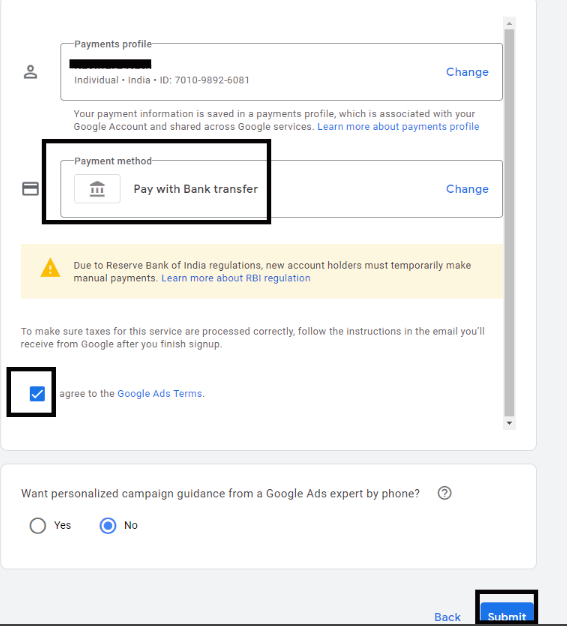
7. Select the “Pay with Bank Transfer” option by clicking on the “Payment Method” tab.
8. After filling all the details, you will see something like shown below.
Now select The terms and conditions and click on the Submit button as shown below.
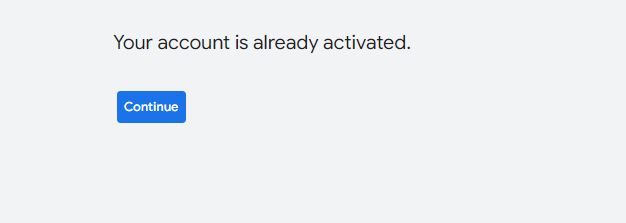
10. You are all set now. Click on the “Explore your account” option, to explore your account.
Add Business Name & Details in “Google Ads” Account
1. Login to Your Google Ads account.
2. Go to “Preferences” options.
2a. Follow this if you have old interface of Google Ads –
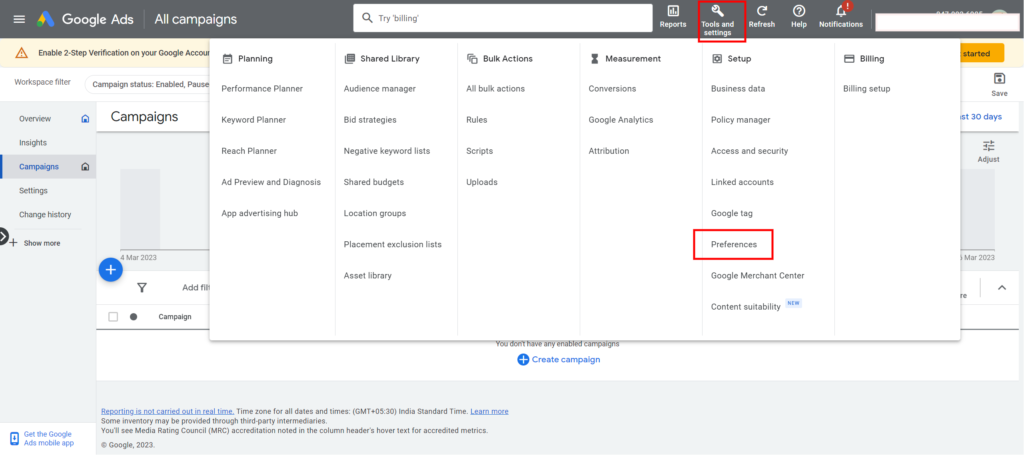
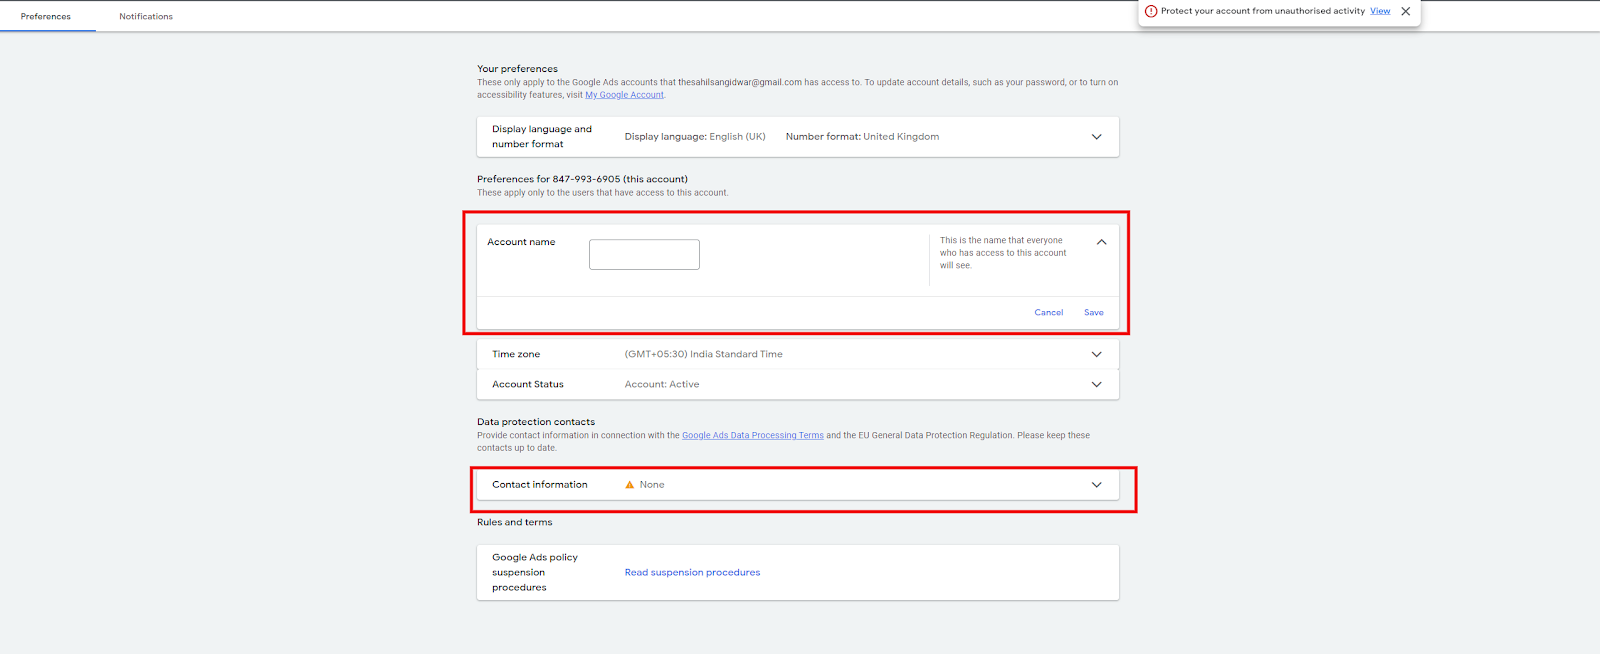
2b. Follow this if you have new interface of Google Ads –
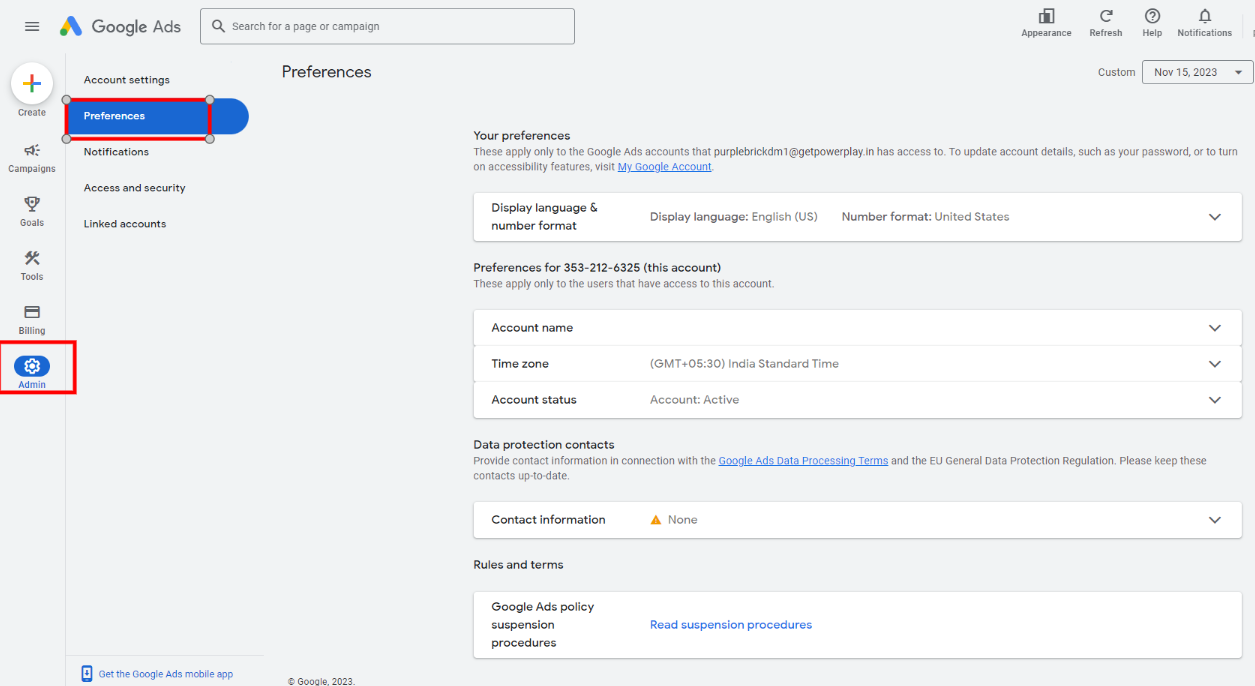
3. Enter the Account Name (Business Name) & Contact Information and Save It.

RELATED ARTICLES

Meta Ads Set-up
A) You may already have a Business Manager. Check it!Log in to your personal Facebook account. Find the existing Business Manager by g ...

Real Estate SEO: How to Rank Higher and Get More Local Leads #2
Most homebuyers begin their property search online, making it essential for real estate agents to maintain a strong online presence. Real Es ...
Add a Comment
You must be logged in to post a comment