Note: Only 2 Business Manager accounts can be created from Single Profile.
A) You may already have a Business Manager. Check it!
- Log in to your personal Facebook account.
- Find the existing Business Manager by going to https://business.facebook.com/select
- If you have a business manager, you will see something like this:
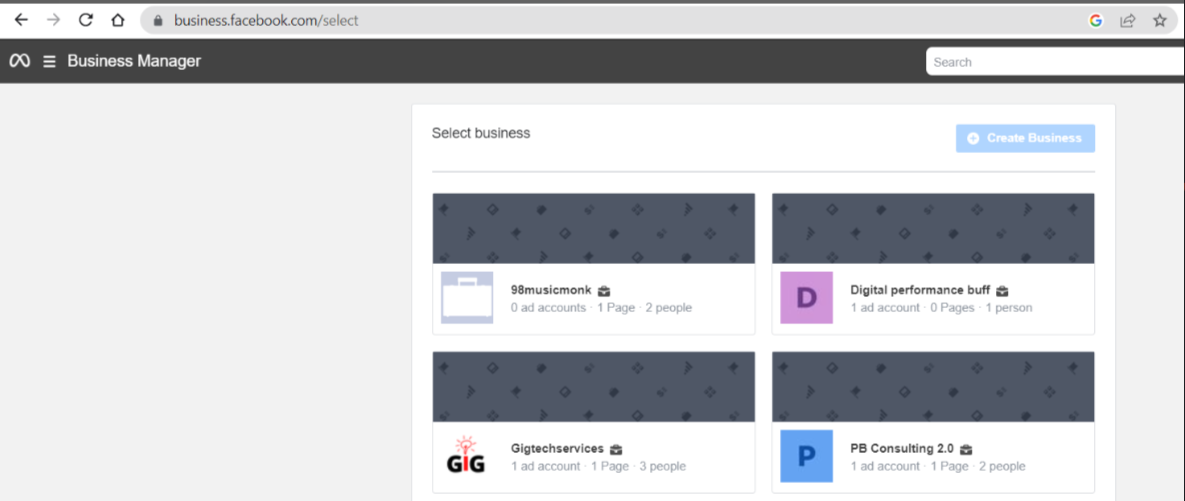
- Then select the relevant one and go to “Next section” (and skip “point B”).
B) To create new BM, follow the steps given below
If you already have a business manager, then skip this step
- Log in to your personal Facebook account.
- Go to business.facebook.com/overview

- Click Create an account.
- Enter a name for your business, your name, and your email address, and Submit.
- The pop-up screen will direct you to check your email for confirmation of your account.
- Click the link in your email to confirm your account.
How to open Business Setting of Business Manager-
- Log in to your personal Facebook account and Go to https://business.facebook.com/select.
- Then select your BM (Business Manager) and you will be redirected to the Business Setting.
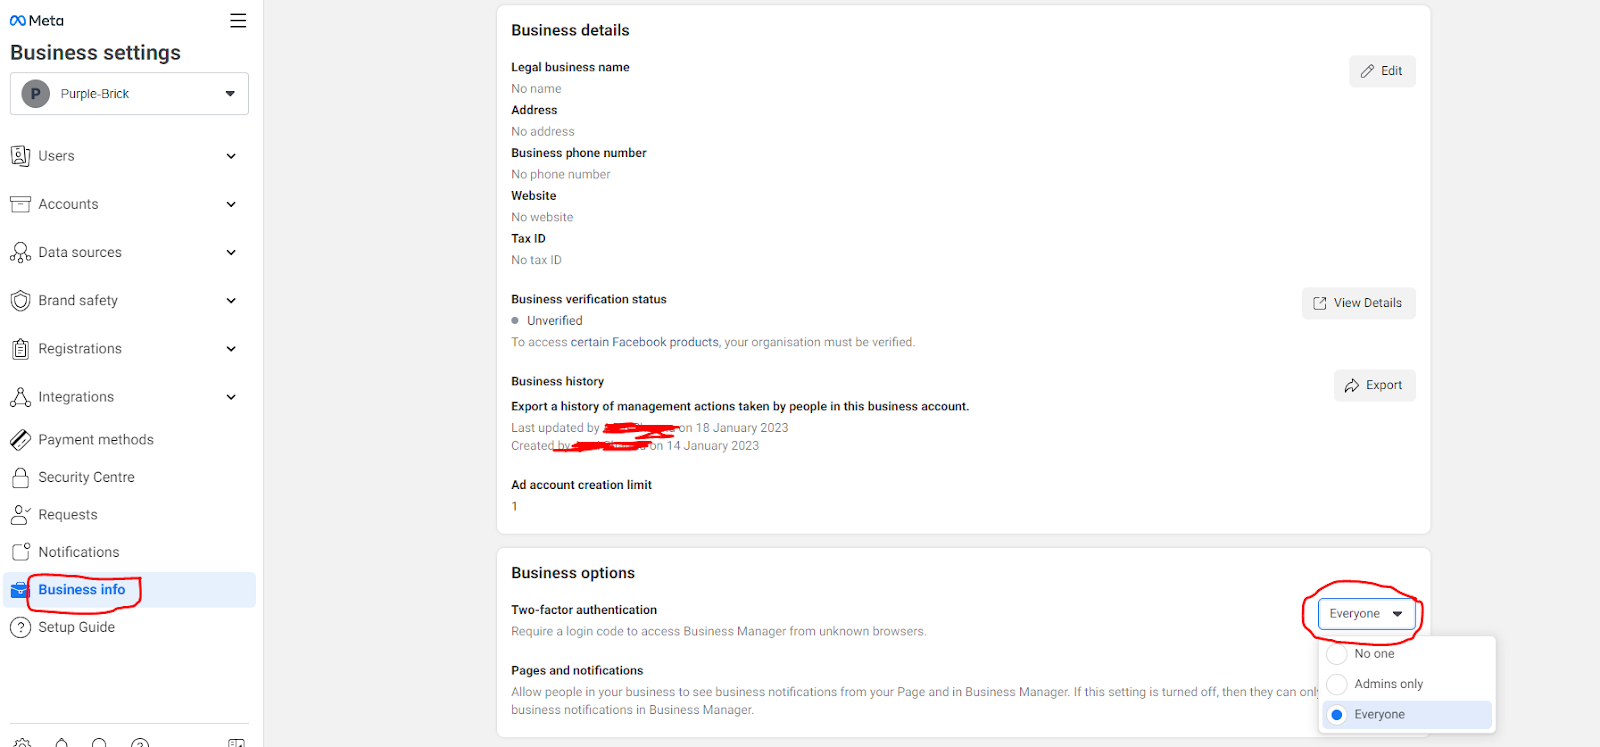
Most Important things of “Business Info” section to remember after creating BM
1. Enable “Two-Factor Authentication”
- Open Business Manager.
- Go to the Business setting from the left panel.
- Click “Business Info” from the left panel..
- Choose “Everyone” from the drop-down of the “Two-Factor Authentication” tab.
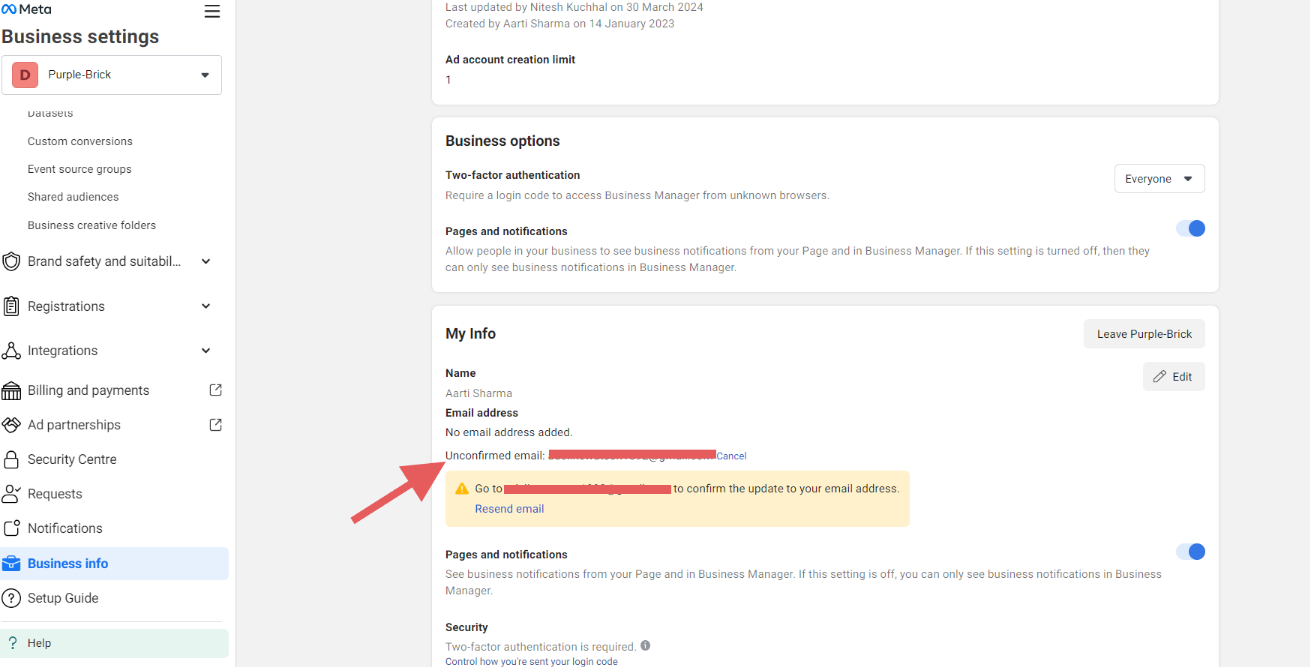
2. Make sure your email is verified. If not, do this before proceeding ahead.
- If the “Email Address” section shows “Unconfirmed email” as shown in the screenshot below.
Then please verify it.
***Note – A screenshot of verified email (For reference)
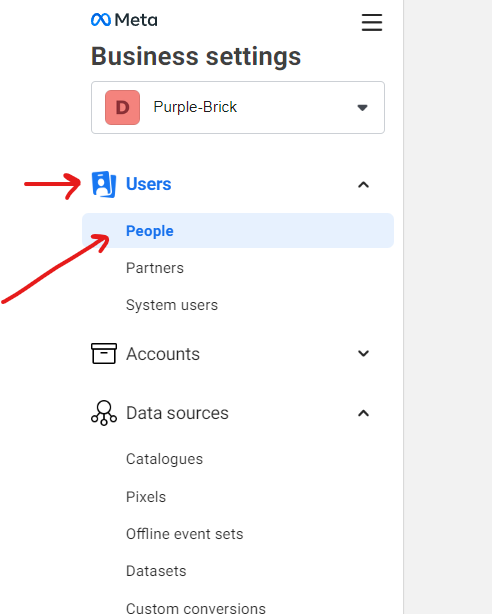
Give access to Yourself (Additionally, included the steps for adding any other person to your BM)
- Open the “Business setting” of your Business Manager. Then go to “Users”.
- Click on “People”.

- Click the “Invite People” tab available in the top right side.

- Now you will have a pop up box where you need to enter your email id.


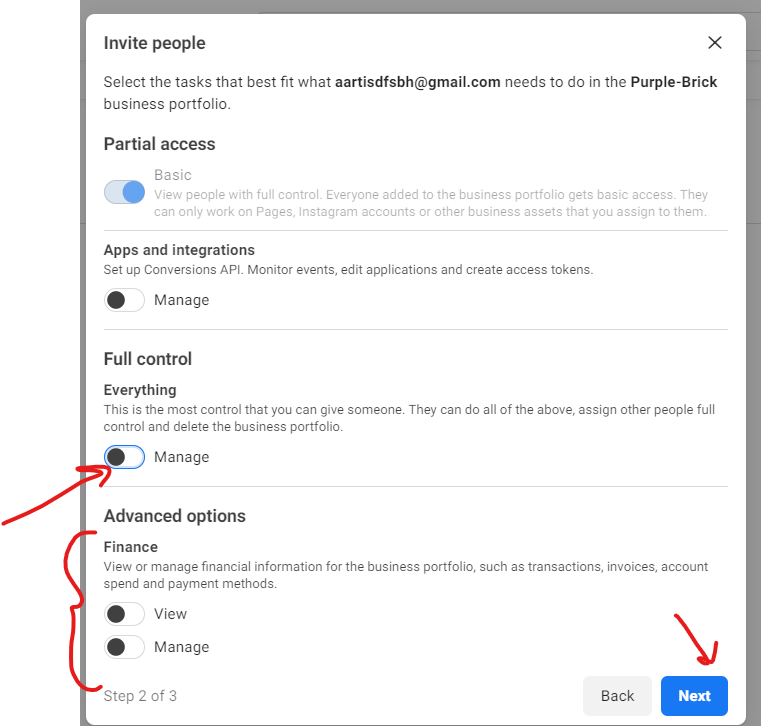
- Now you will see a new box where you can see different types of access.
***Make sure you enable the “Everything” tab available in the “Full Control” section and “Manage” tab of the “Finance” section too for yourself.***
- Then you will see a new pop box where you can see different FB assets (Page, Ad account, Dataset ect) in the left panel.
Select the necessary ones along with the access type from the right side. And then click on the “invite” tab. (This step is required when you add someone else in your BM).
Note – In Recommended set up, we advised you to run the ads with the “Personal Ad account” which is linked to Facebook profile. But if you are doing an Advance Setup, then we recommend creating a new Ad account.
A) If you already have an “Ad Account” then connect it to your BM
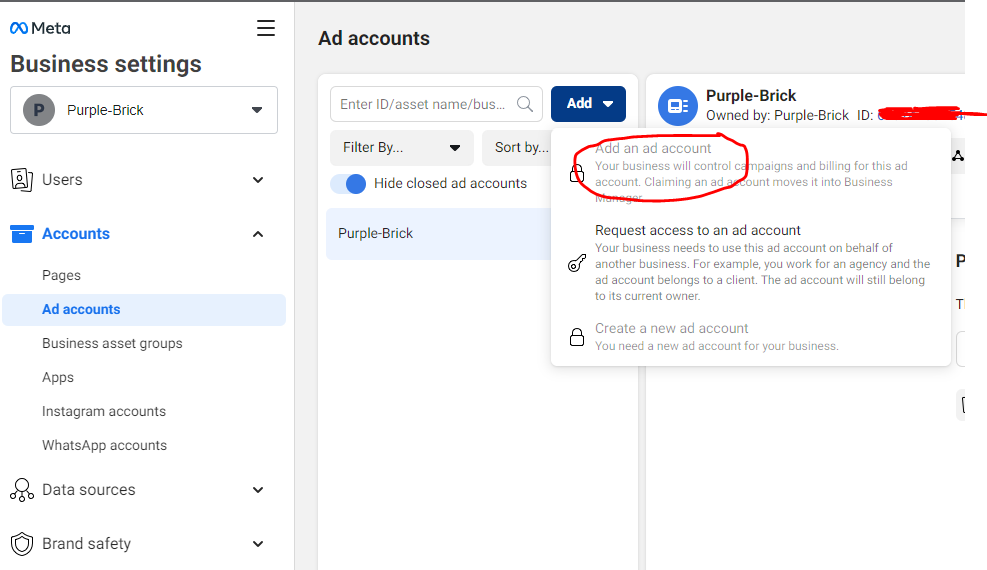
- Open Business Manager and then select ‘Business settings’.
- Click ‘Accounts’ from the menu on the left-hand side menu. Then, click ‘Ad accounts’.
- Click the blue ‘Add’ drop-down menu.
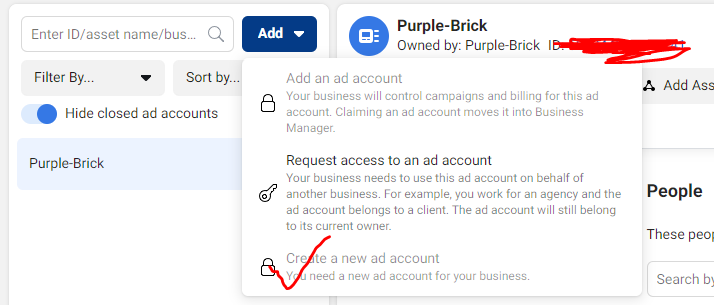
- Choose “Add an ad account”.
- Then enter the Ad account ID and click on the “Add Ad Account” blue button.

How to Find Ad account ID
One way – Find your ad account ID (account drop-down menu)
- Go to Ads Manager.
- Your ad account ID number is shown above the search and filter bar in the account drop-down menu.
Another Way – Find your ad account ID in the address bar
- Go to Ads Manager.
- Find the number in your browser’s address bar. If you have trouble with locating your ad account ID in the address bar, look for act= in the URL.
B) Or Else Create a New Ad account
- Open Business Manager and then select ‘Business settings’.
- Click ‘Accounts’ from the menu on the left-hand side menu. Then, click ‘Ad accounts’.
- Click the blue ‘Add’ drop-down menu.
- Select “Create a new ad account”.
- Now a pop-up box will appear where you need to add “Ad account name”, and choose Time zone & Currency.

- Another pop-up will come like
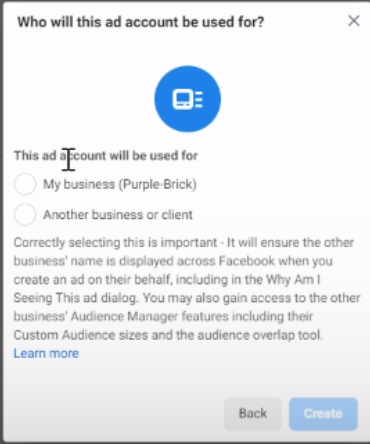
- Choose My Business and hit the “Create” button.
C) Give Ad account access to yourself.

Nitesh Kuchhal
Nitesh Kuchhal is an Alumnus of IIM Calcutta (2011-13). He has over 6 years of experience in Digital Marketing. He is the founder & CEO of a Gurgaon based Digital Marketing & Digital Product Startup - Purple Brick Consulting.
Add a Comment
You must be logged in to post a comment