
A) You may already have a Business Manager. Check it!
- Log in to your personal Facebook account.
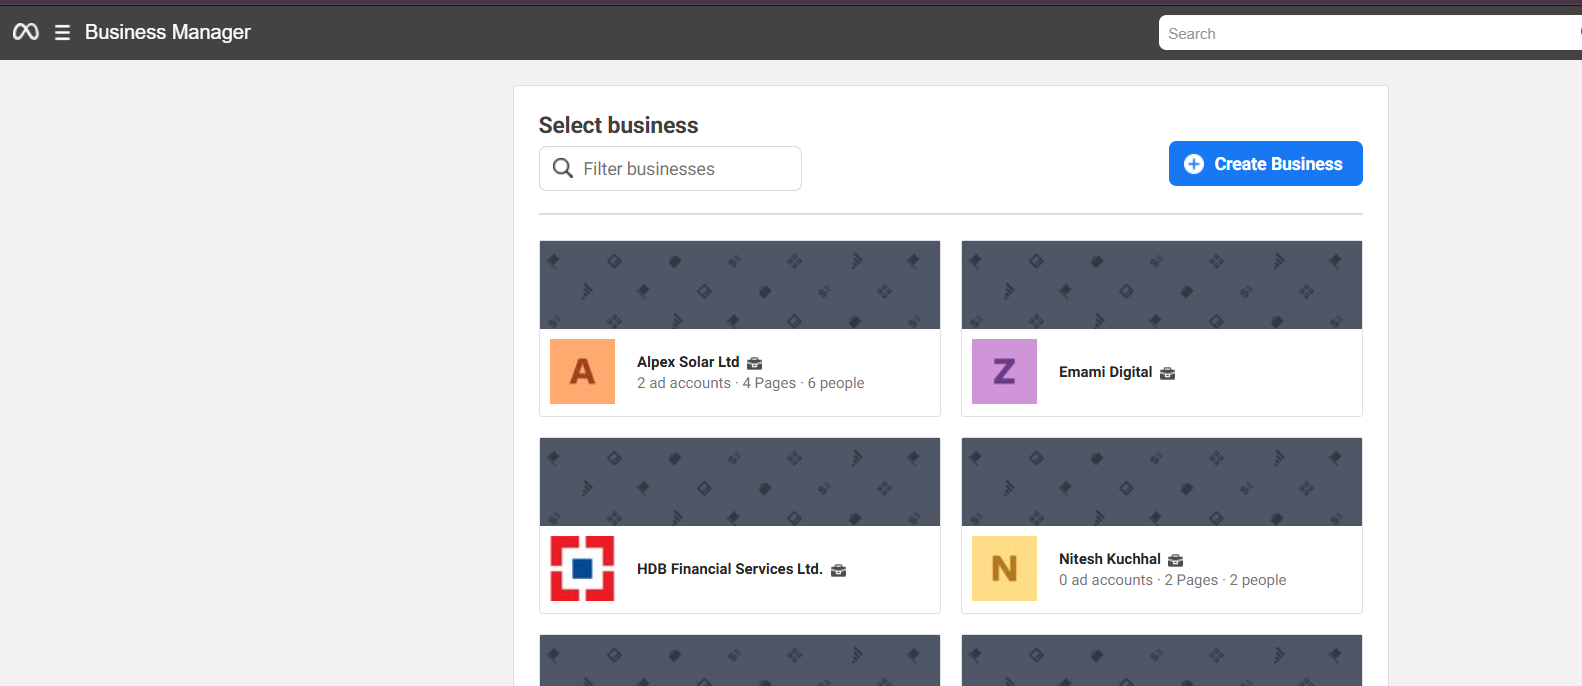
- Find the existing Business Manager by going to https://business.facebook.com/select
- If you have a business manager, you will see something like this:
- Then select the relevant one and go to “Next section” (and skip “point B”).
B) To create new BM, follow the steps given below
If you already have a business manager, then skip this step- Log in to your personal Facebook account.
- Go to business.facebook.com/overview
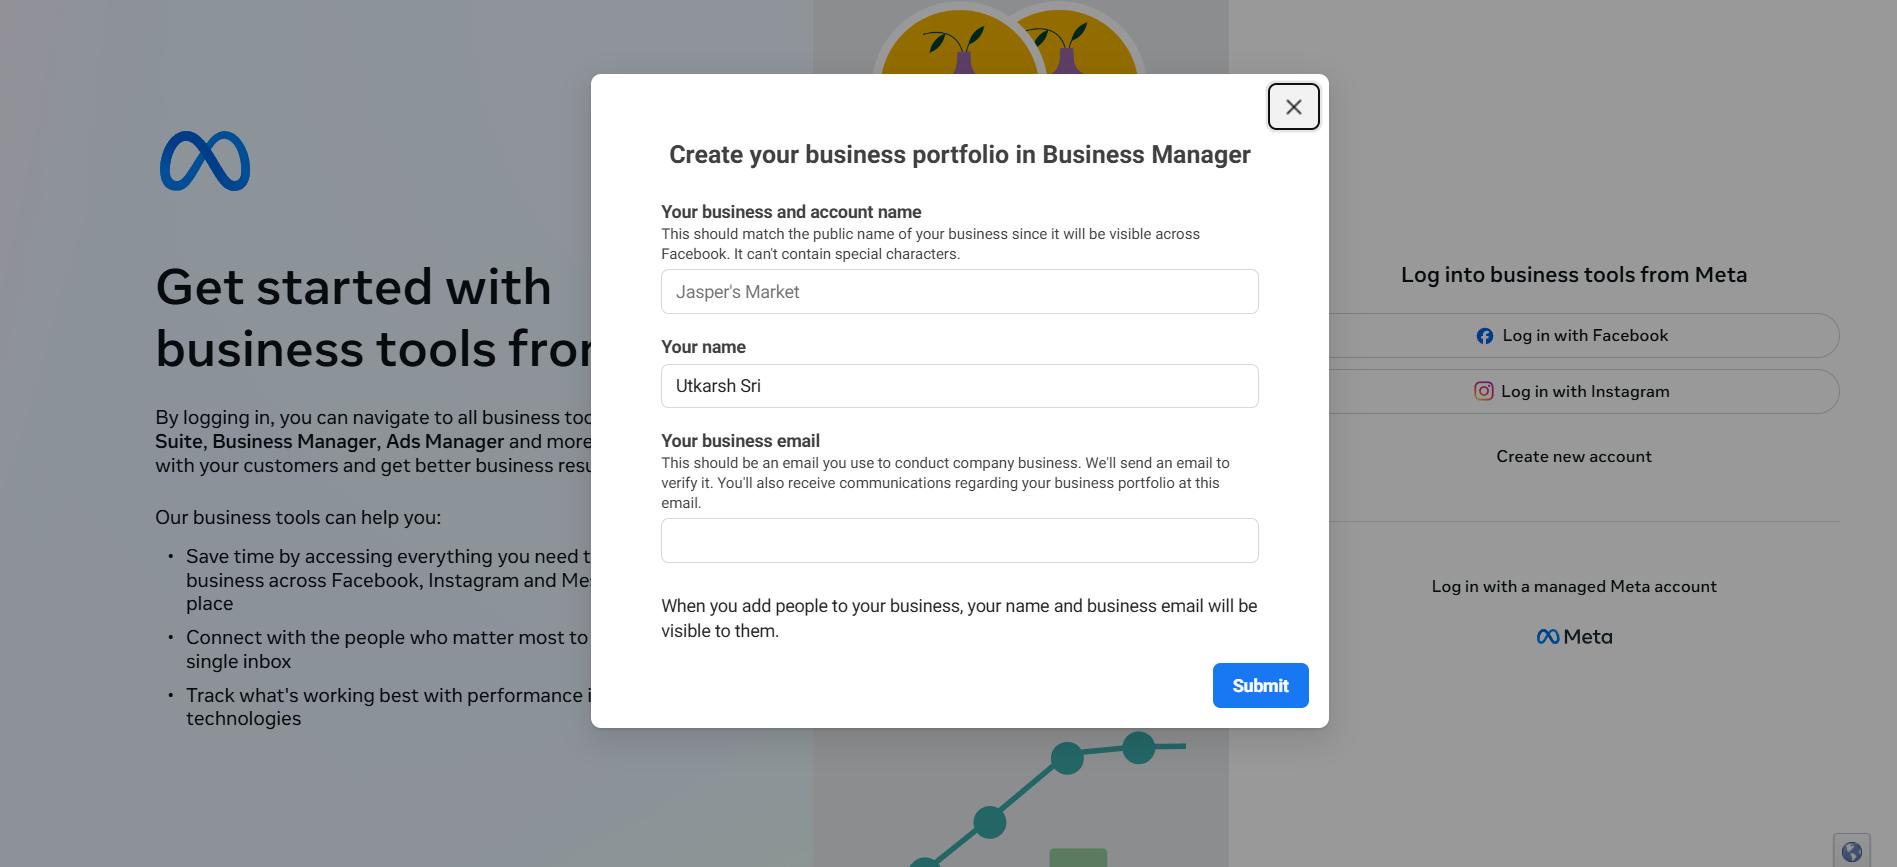
- Click Create an account.
- Enter a name for your business, your name, and your email address, and Submit.
- The pop-up screen will direct you to check your email for confirmation of your account.
- Click the link in your email to confirm your account.
- Log in to your personal Facebook account and Go to https://business.facebook.com/select.
- Then select your BM (Business Manager) and you will be redirected to the Business Setting.
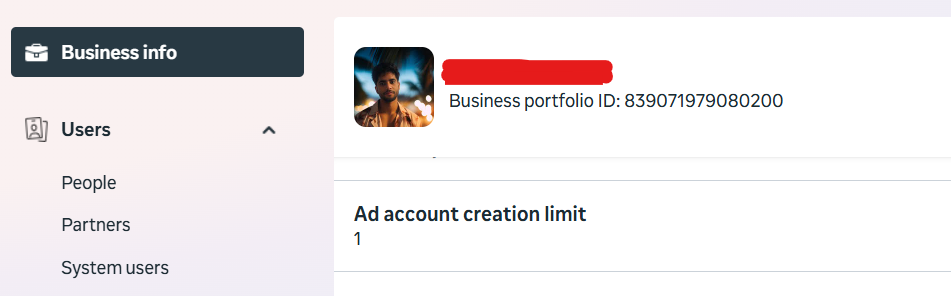
Most Important things of “Business Info” section to remember after creating BM
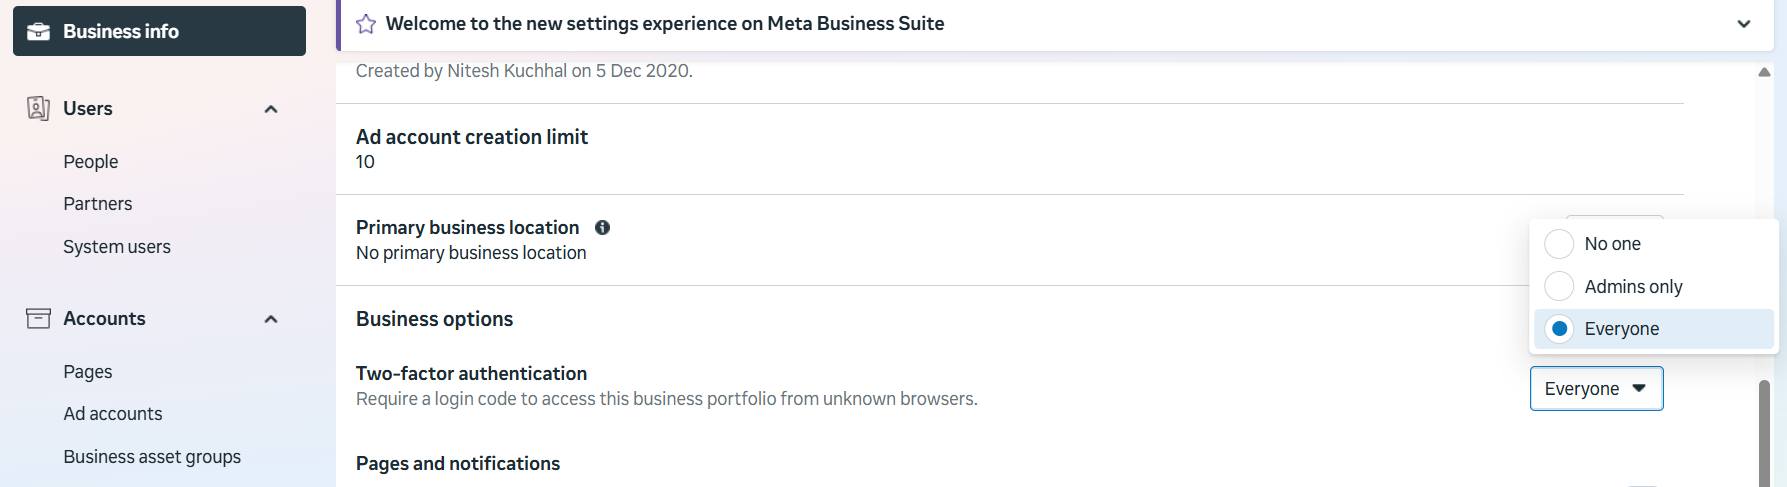
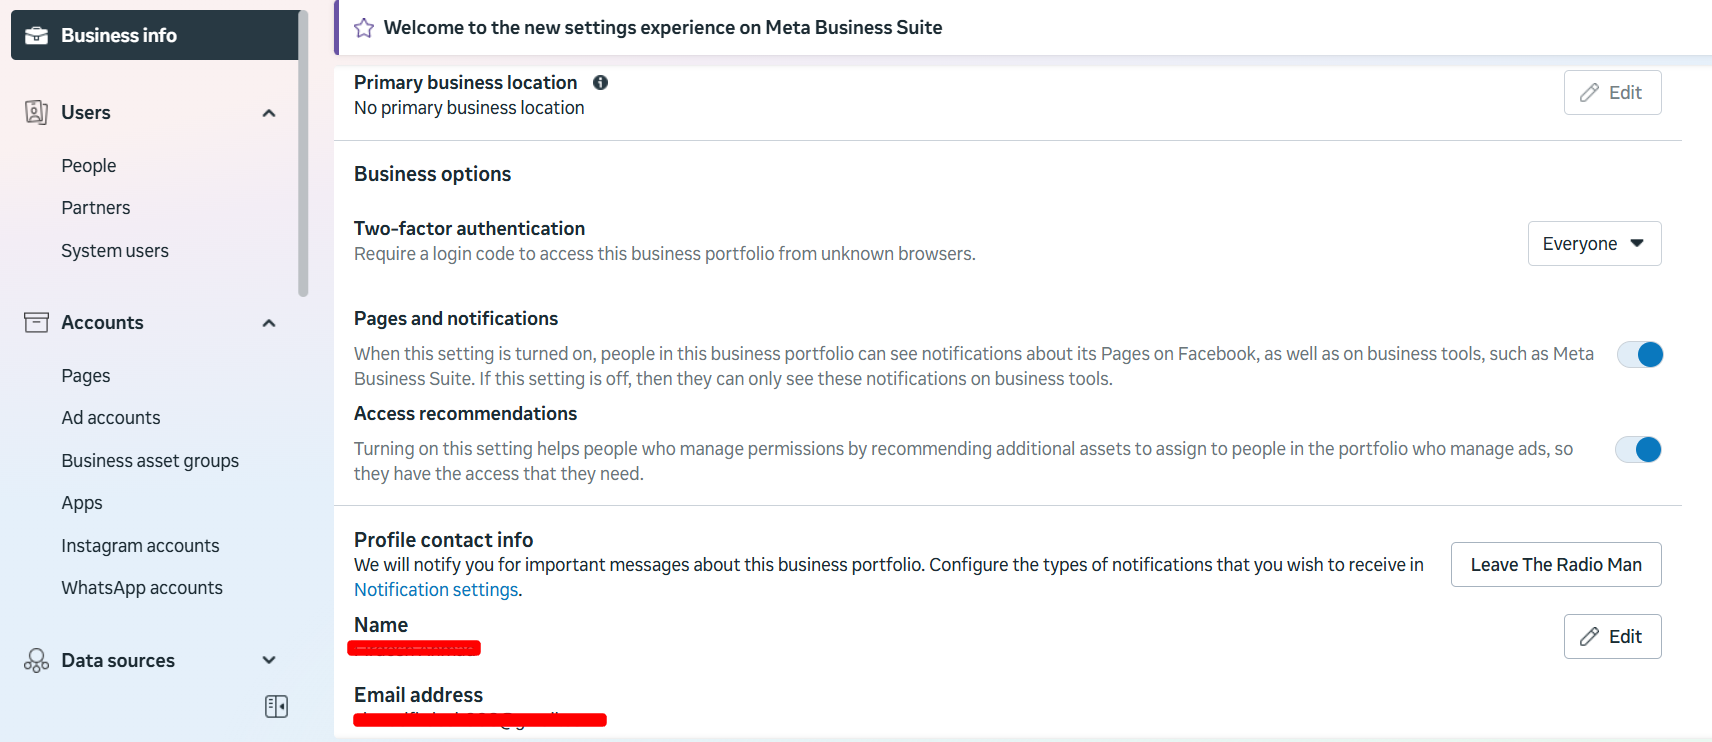
1. Enable “Two-Factor Authentication”
- Open Business Manager.
- Go to the Business setting from the left panel.
- Click “Business Info” from the left panel..
- Choose “Everyone” from the drop-down of the “Two-Factor Authentication” tab.
2. Make sure your email is verified. If not, do this before proceeding ahead.
- If the “Email Address” section shows “Unconfirmed email” as shown in the screenshot below. Then please verify it.
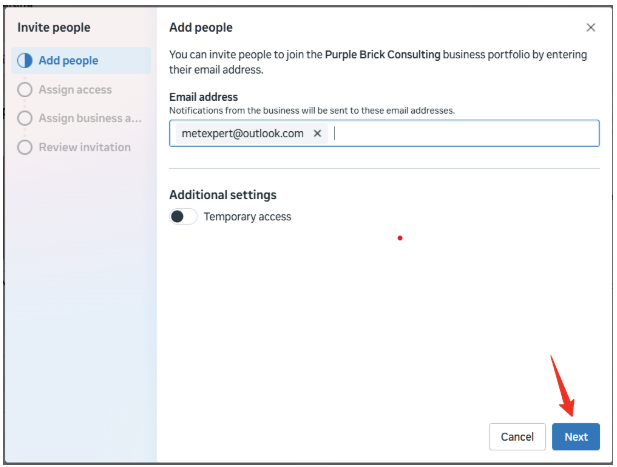
Give access to Yourself (Additionally, included the steps for adding any other person to your BM)
- Open the “Business setting” of your Business Manager. Then go to “Users”.
- Click on “People”.

- Click the “Invite People” tab available in the top right side.

- Now you will have a pop up box where you need to enter your email id.
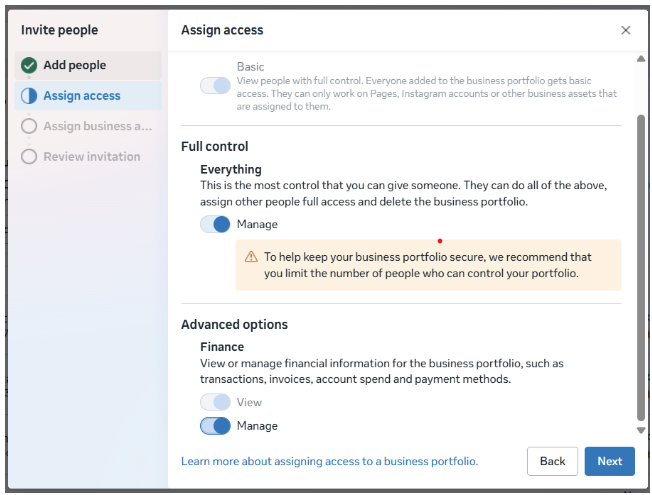
- Now you will see a new box where you can see different types of access. ***Make sure you enable the “Everything” tab available in the “Full Control” section and “Manage” tab of the “Finance” section too for yourself.***
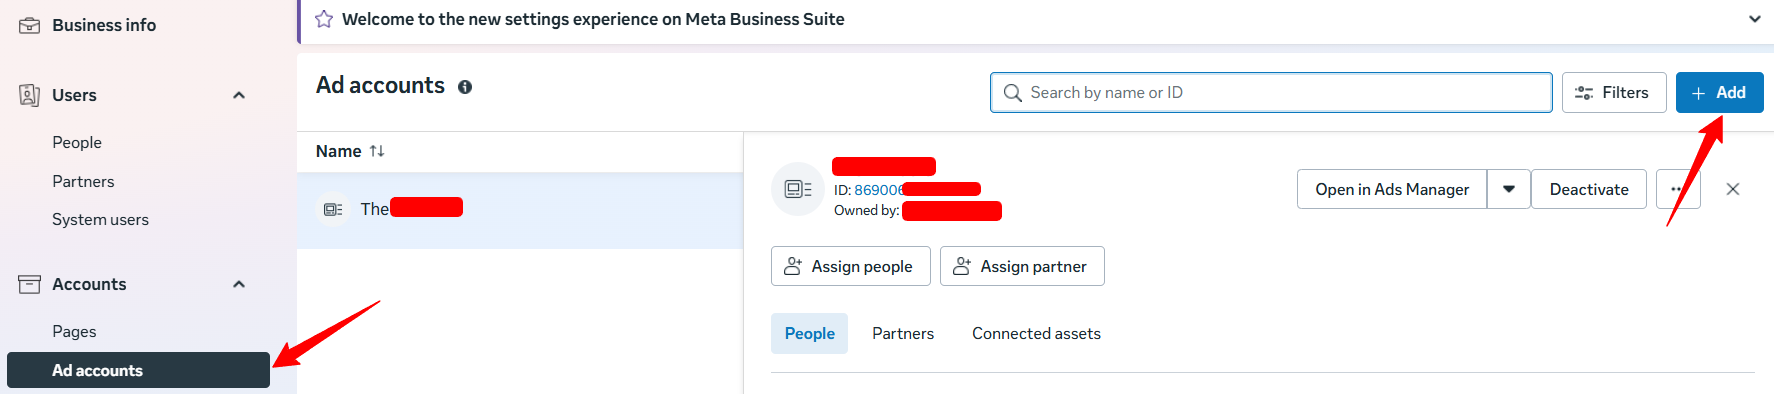
Create a New Ad account in the Business Manager
- Open Business Manager and then select ‘Business settings’.
- Click ‘Accounts’ from the menu on the left-hand side menu. Then, click ‘Ad accounts’.
- Click the blue ‘Add’ drop-down menu.
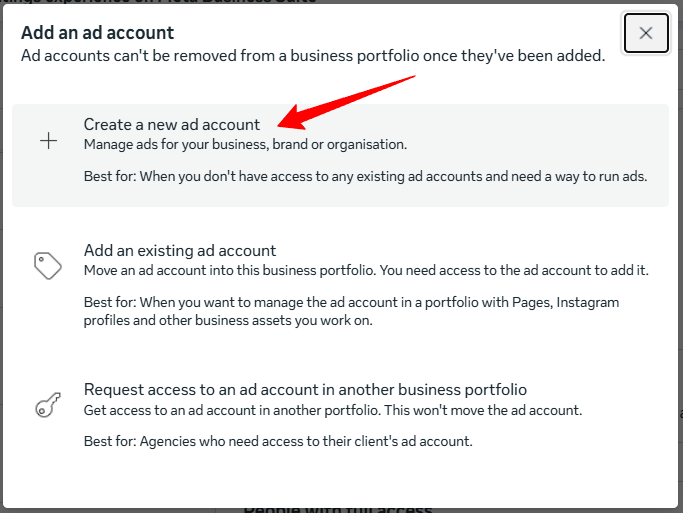
- Select “Create a new ad account”.
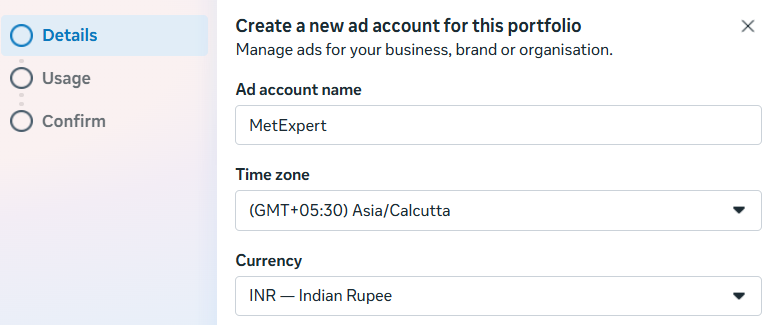
- Now a pop-up box will appear where you need to add “Ad account name”, and choose Time zone & Currency.
- Another pop-up will come like
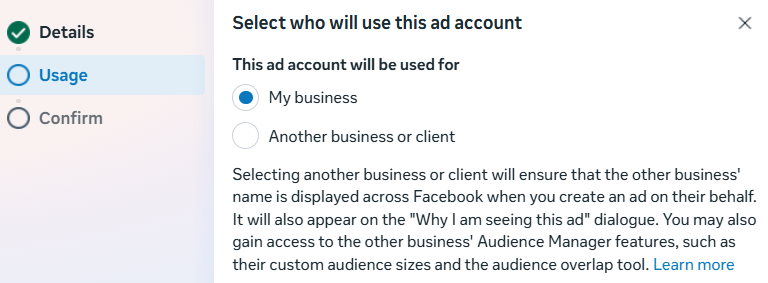
- Choose My Business and hit the “Next” button.
- In the next screen confirm the Ad account creation.
A) If you already have an “Ad Account” then connect it to your BM
Find your ad account ID: Go to Ads Manager > Your ad account ID number is shown above the search and filter bar in the account drop-down menu.- Open Business Manager and then select ‘Business settings’.
- Click ‘Accounts’ from the menu on the left-hand side menu. Then, click ‘Ad accounts’.
- Click the blue ‘Add’ drop-down menu.
- Choose “Add an ad account”.
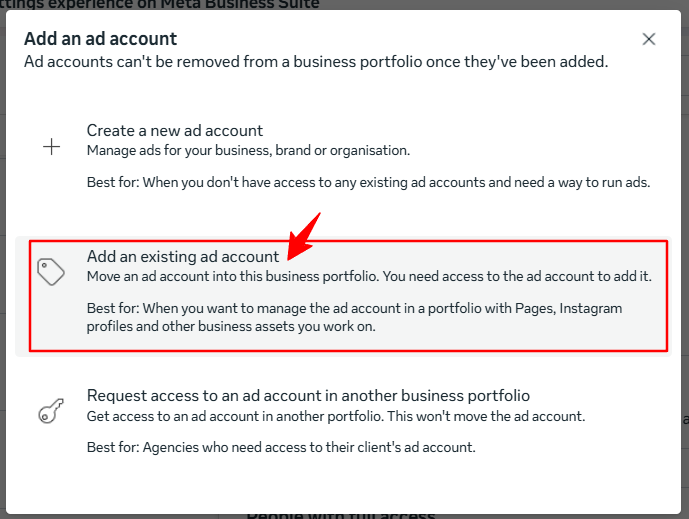
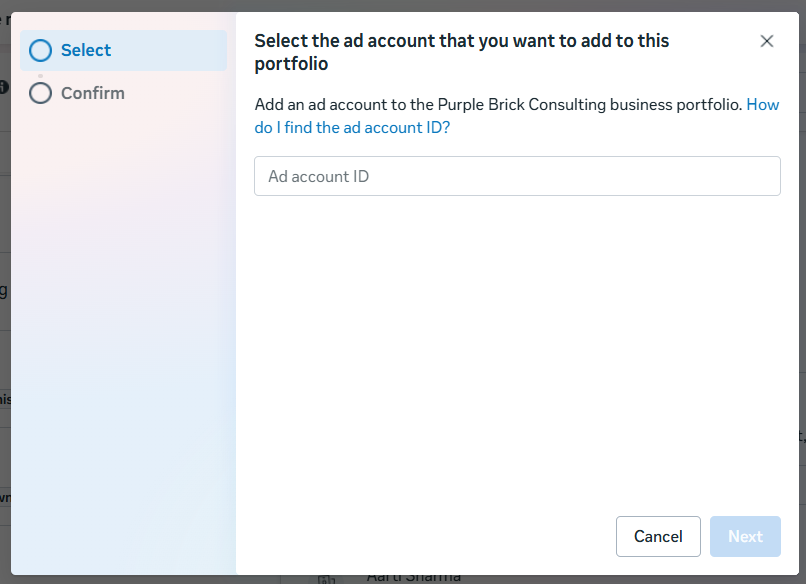
- Then enter the Ad account ID and click on the “Add Ad Account” blue button.
Facebook Page Create Facebook Page
- Login your facebook account.
- Click on “Pages” from the left panel.
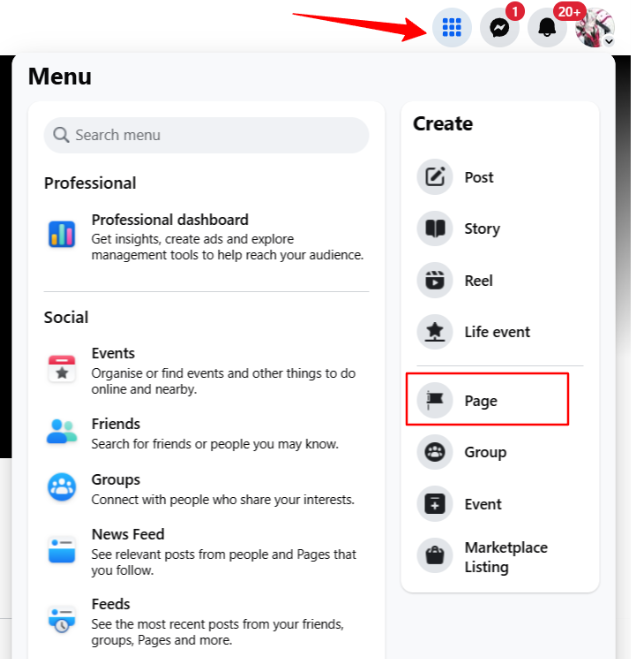
- Click on “Create New Page”.
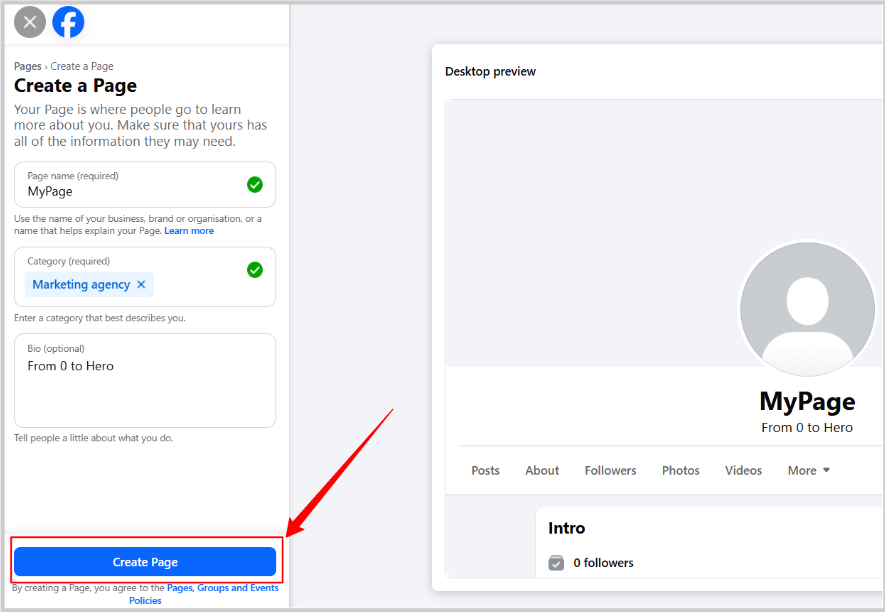
- Add “Page name” and “Category” that best describes your facebook page.
- Add Profile Picture and Cover Photo if you have. It’s optional. Then click on “Next”.
- Complete the Next steps. Skip the steps that allow. Can fill non-compulsory details later.
Instagram Setup (Via Desktop)
Important Notes-- In Instagram, first we have to create a personal profile and then switch into a Business Profile.
- Do not use your personal profile. Create a new one.
- Make sure you do the setup via Desktop.
- We are creating a Personal profile using the “email” method. If you create the personal profile with “Mobile Phone” then please use +91 before the phone number so you can get the OTP ASAP.
First Create a Personal Profile
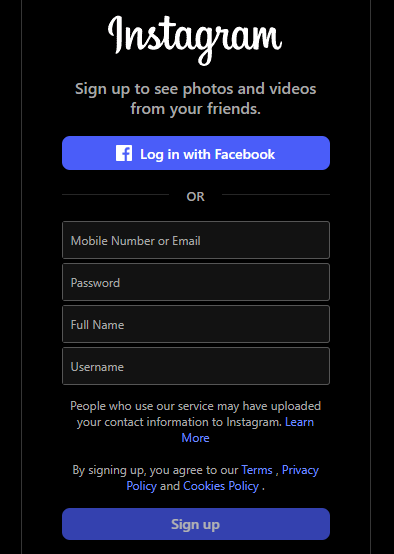
- Go to www.instagram.com/accounts/emailsignup/
- Fill In the Information shown in the screenshot. Make sure to use “business name” as Full Name.
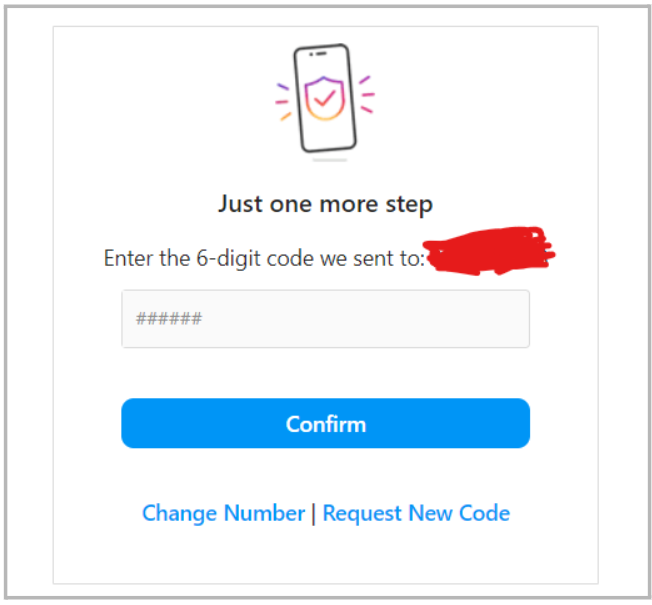
- Enter your DOB and then 6 digit OTP…You are all set
- You are all set! Your account is created.
Switch this profile to the Professional Account/Business Page
- Go to your profile.
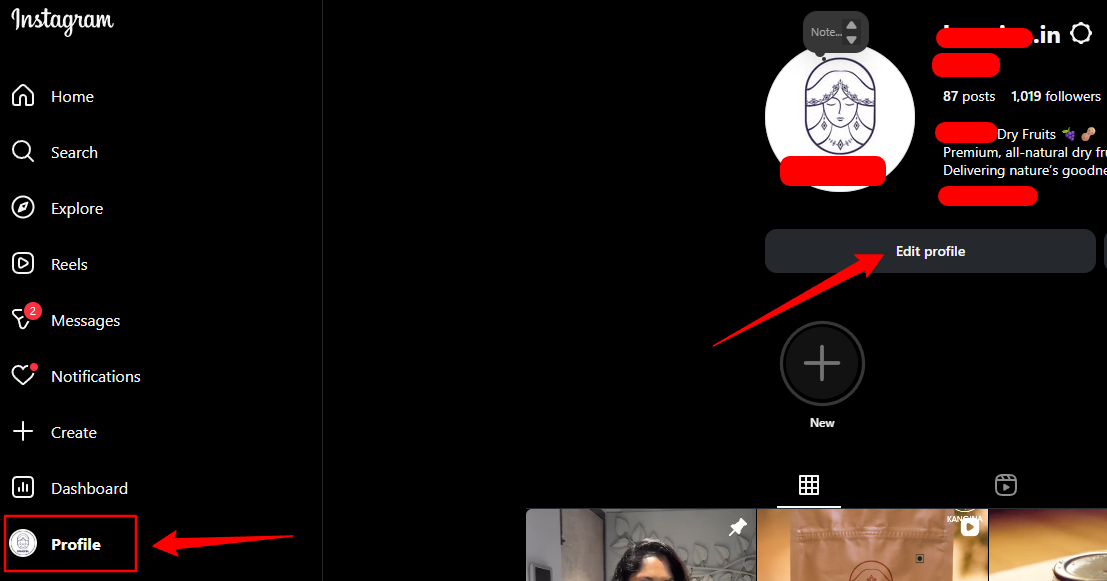
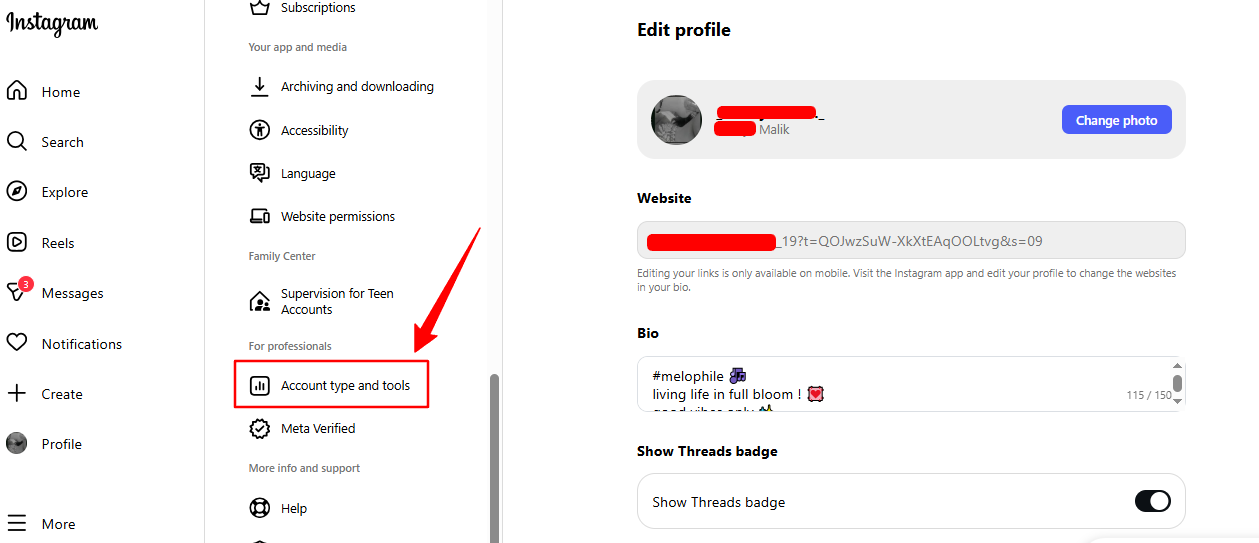
- Click on Edit Profile to access the menu.
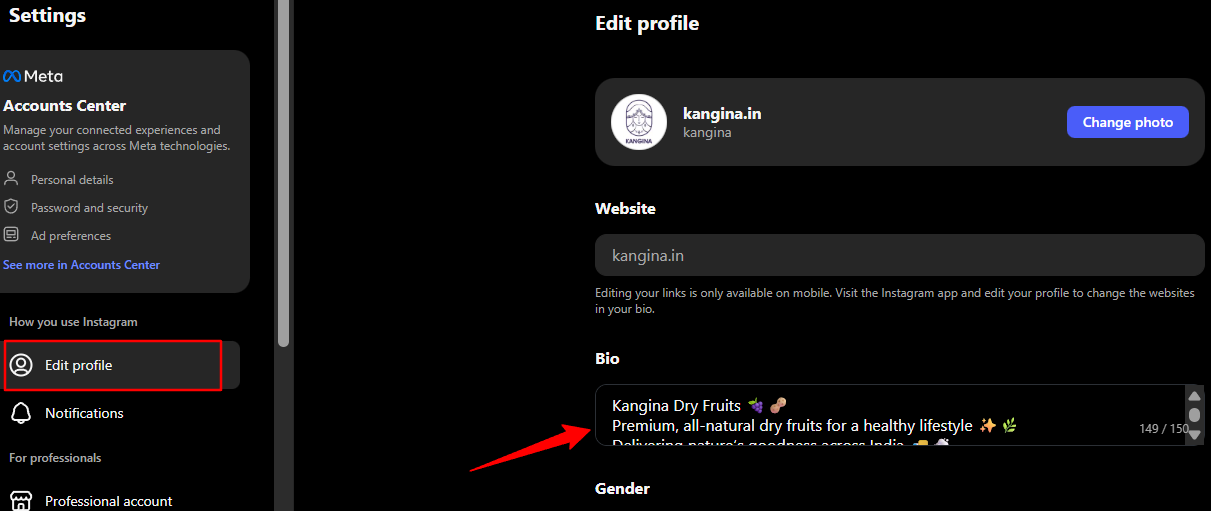
- Enter business bio (explain your business along with some call to action), email id..And then Save it..
- Now tap “Account type and tools.”
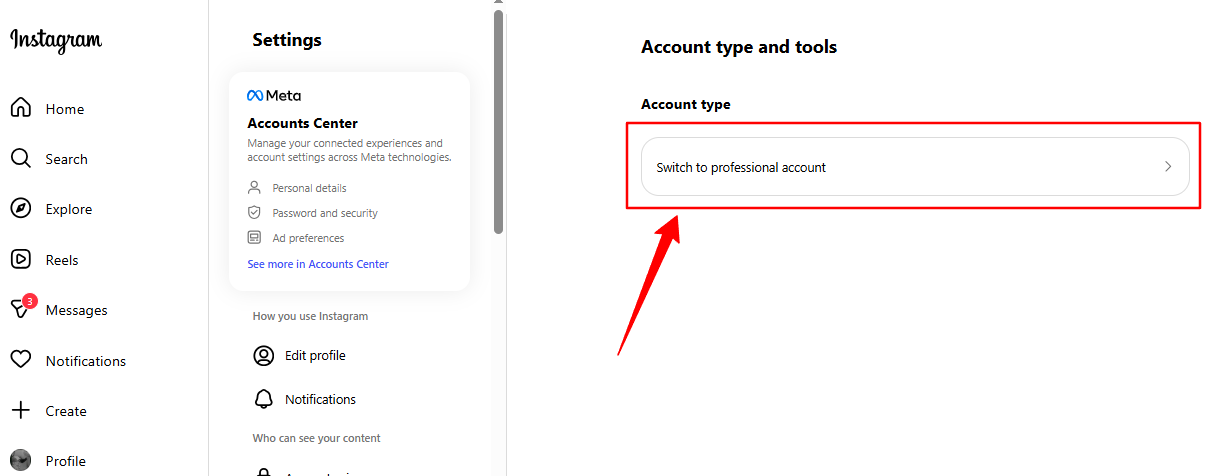
- Choose “Business” as the account type and click on Next.
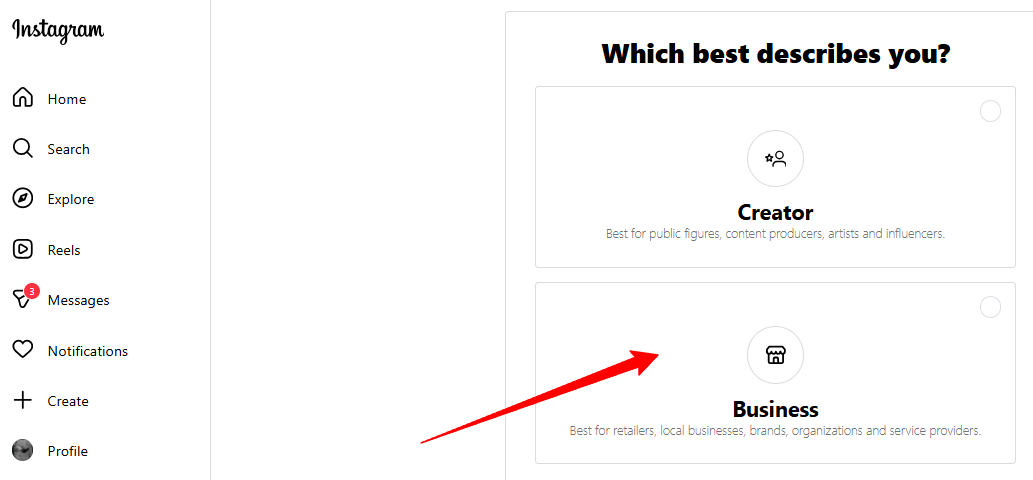
- Again Next.
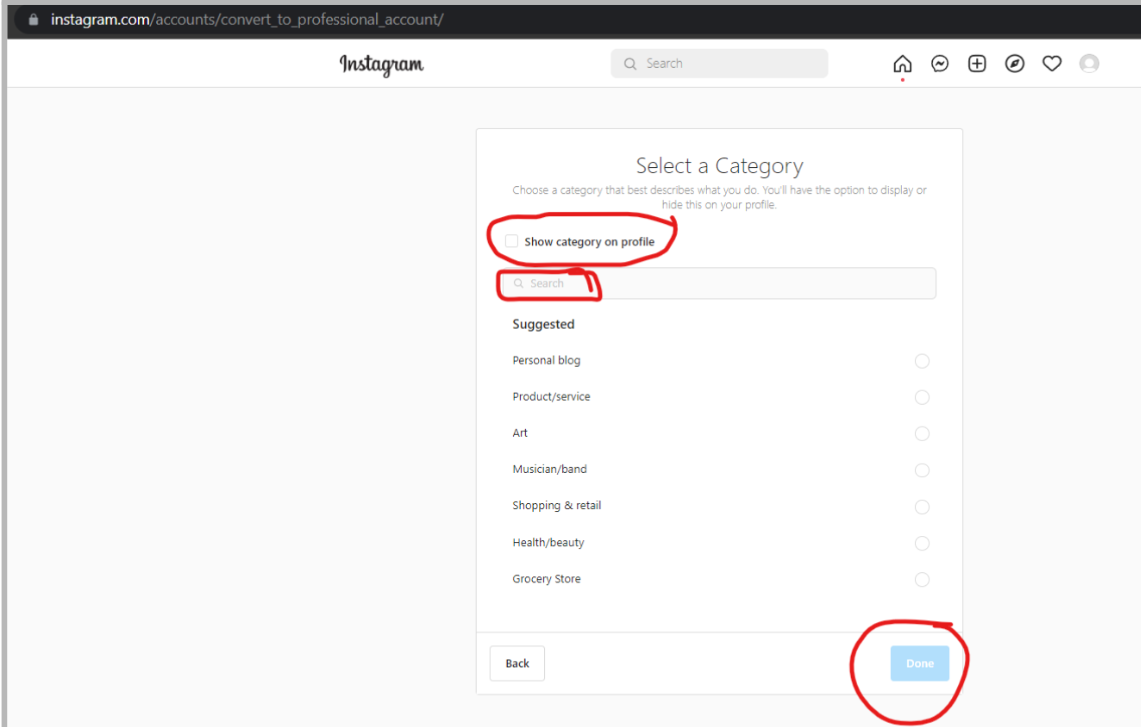
- Search for the relevant business category and check the box of “show category on profile” tab.. and then save..
- Now there are 2 options –
- A – Directly click on “Don’t use my contact info..And you are all set..
- B – Or else, add the contact information and tick the box “Show contact info on profile” and then save…You are all set…
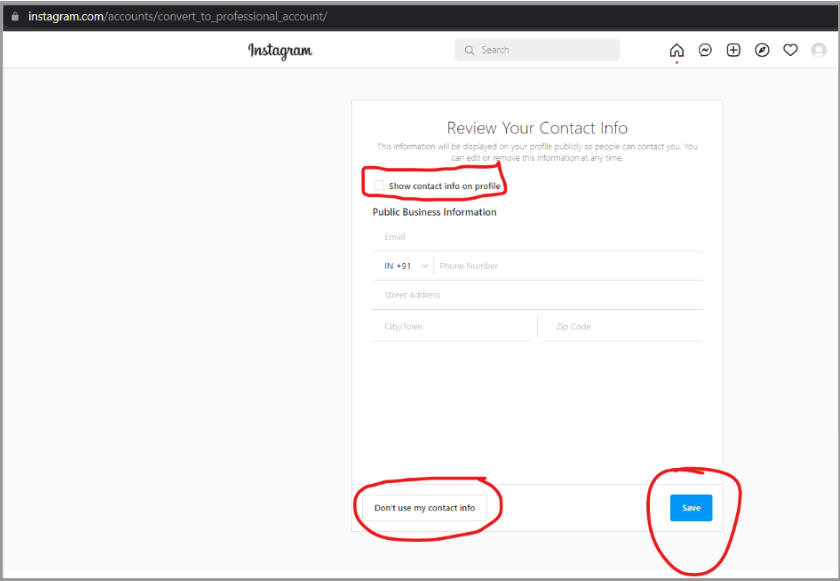
- You are all set..Add relevant business profile pic..
Connect your Instagram Business Page to Facebook Page
- Go to your Facebook Page
- Click on Setting on left Side of Screen
- Click On Linked Account
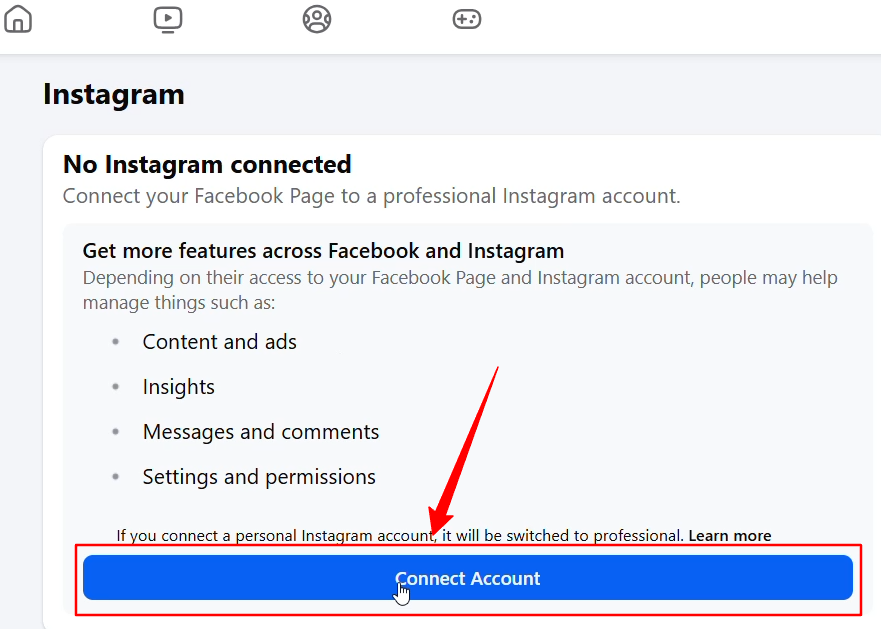
- Select Instagram And Click on Connect Account
- Click On Connect and Login to the Instagram Page which you have created.
- That’s Set
Connect your Instagram Business Page to Facebook Business Manager
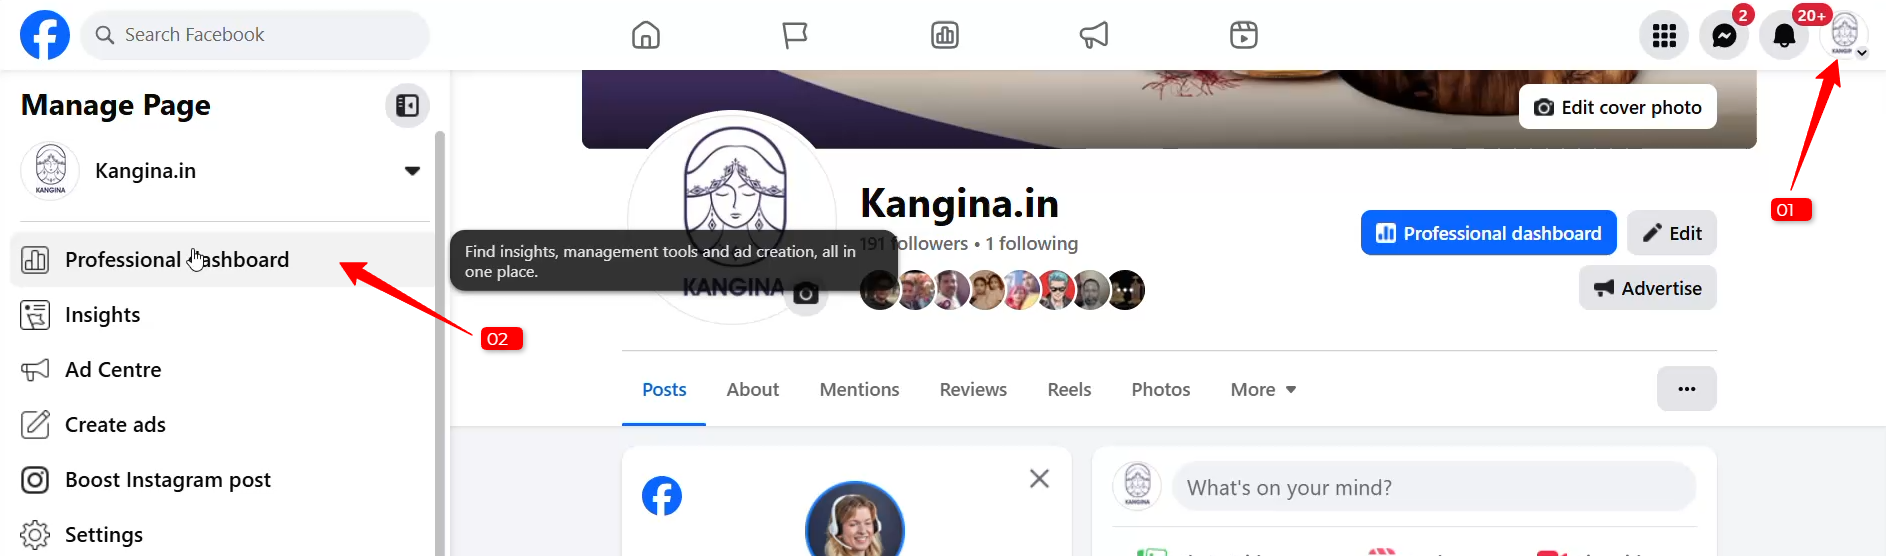
Log in to your personal Facebook account and Go to your Facebook Page Eg.https://www.facebook.com/kangina.in/- Select Page: Click on Professional Dashboard
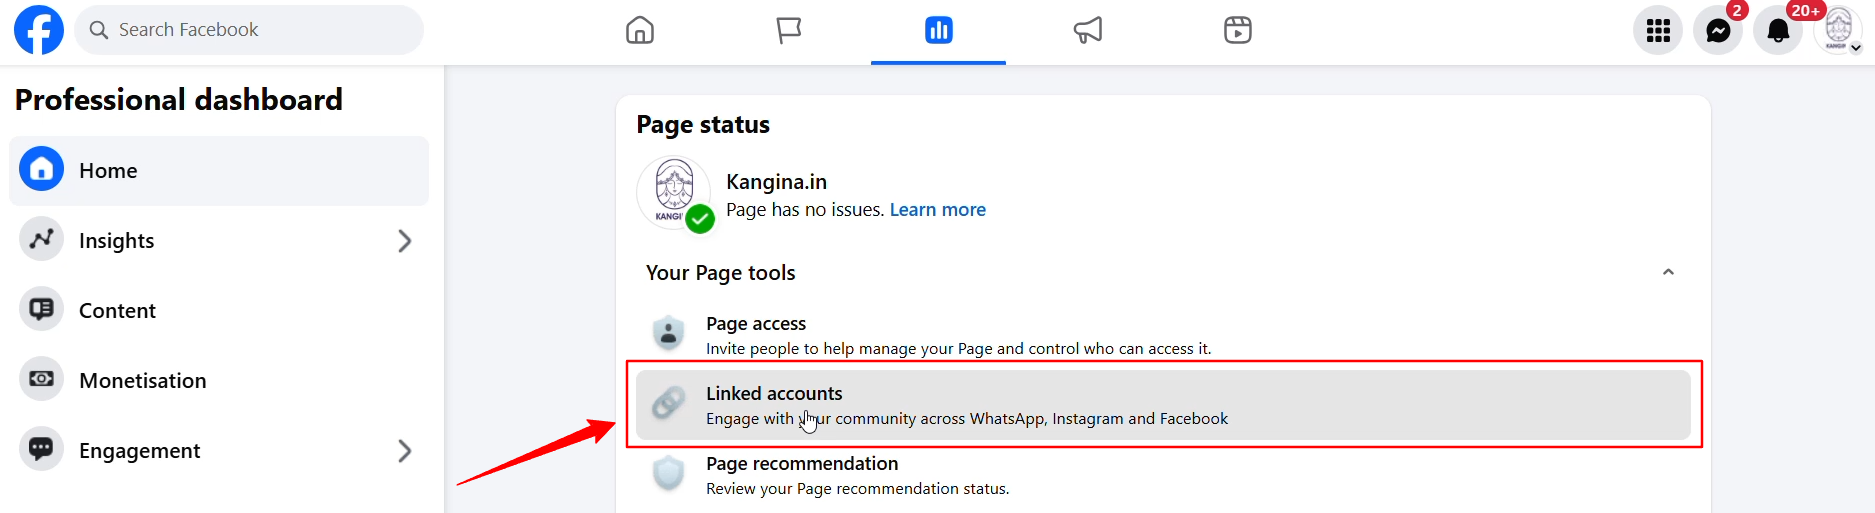
- Click on ‘Linked accounts’
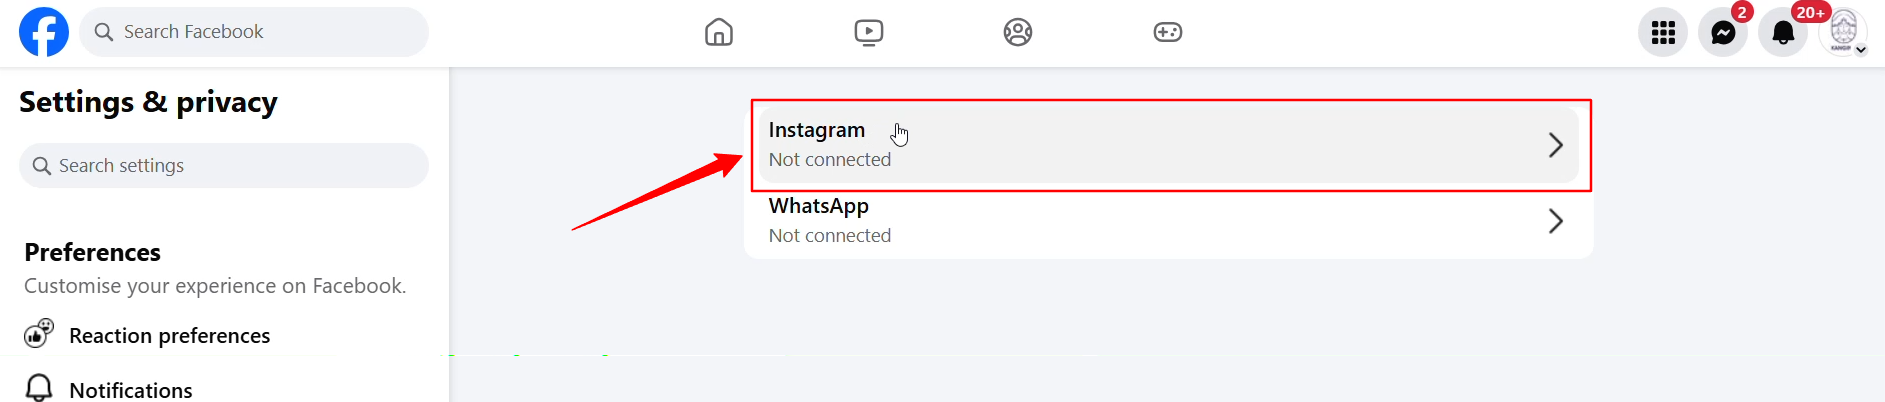
- Select on “Instagram”
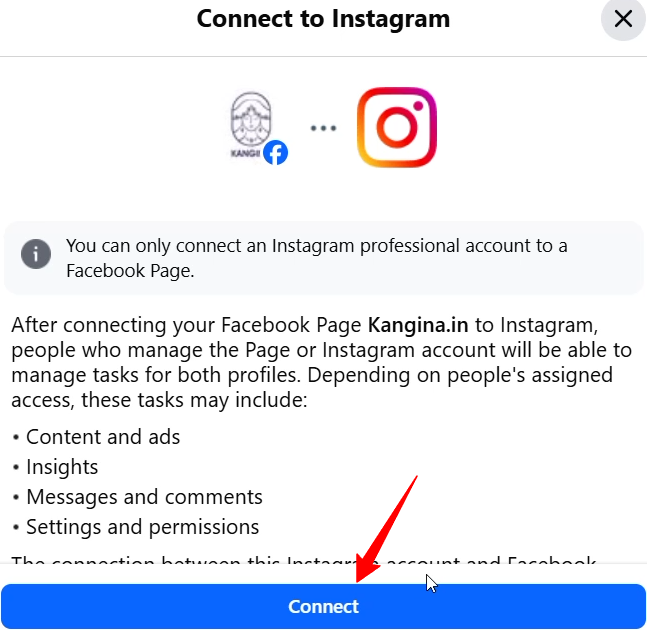
- Click on ‘Connect Account’ > ‘Connect’
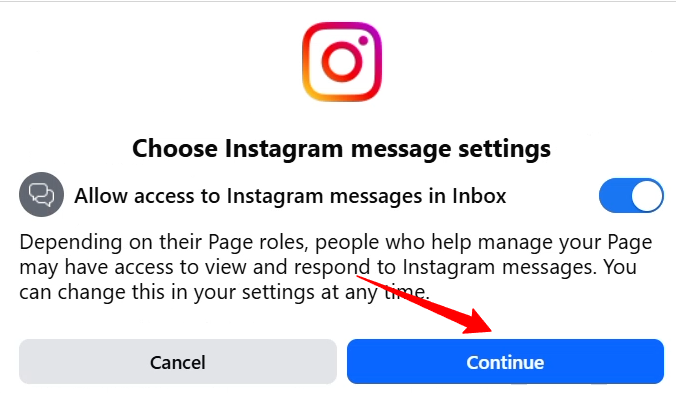
- Click on the “Continue” button.
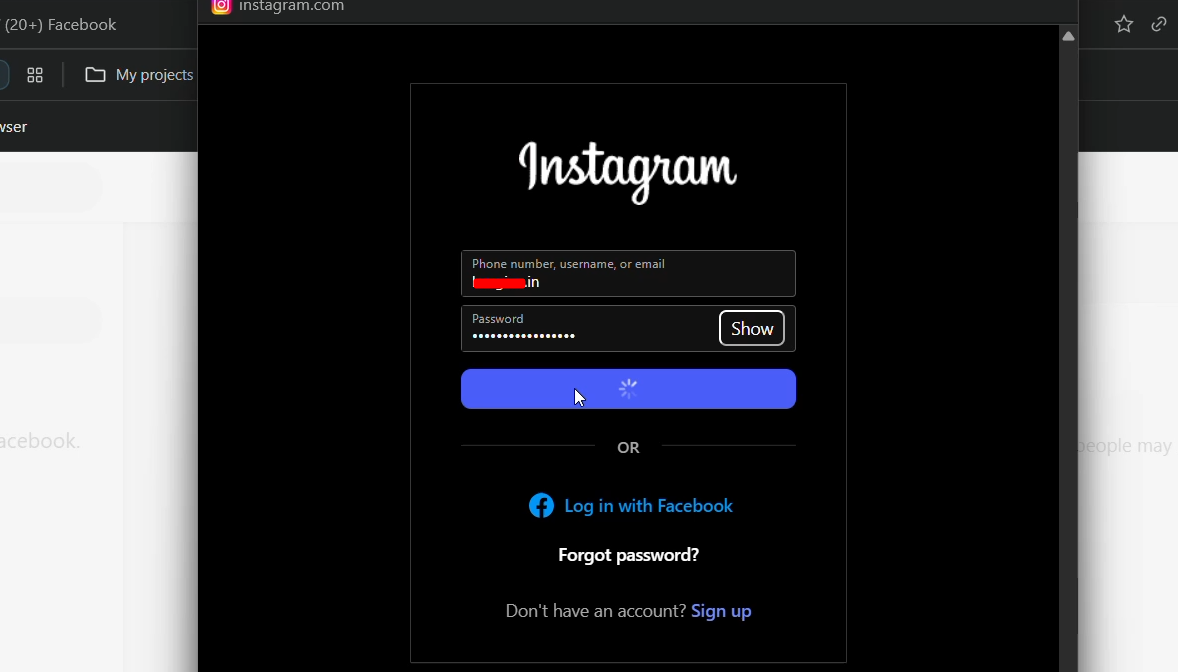
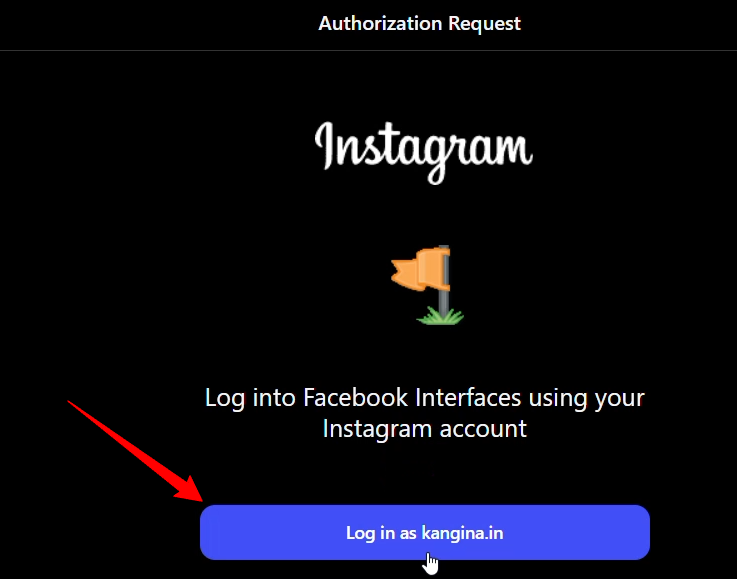
- Now you will see a pop up for logging Instagram. After entering login details,
- Now enter your Instagram username and password.
- Follow the prompts to complete the verification process and you are all set!
Share “Instagram Business Page” access to Yourself (via Facebook Business Manager)
Note– Once the Instagram Page is connected to Fakebook BM then only you can share access to yourself via BM.- Log in to your Business Manager account on Facebook.
- Click on the “Business Settings” button.
- Select the Instagram accounts tab from “Accounts” on the left-hand menu..
- On the right side, you will see the “Add people” tab..Click on in and share the access..
Add a Comment
You must be logged in to post a comment