
Table of Contents
ToggleGoogle Analytics GA4
Create “Google Analytics 4″ Account
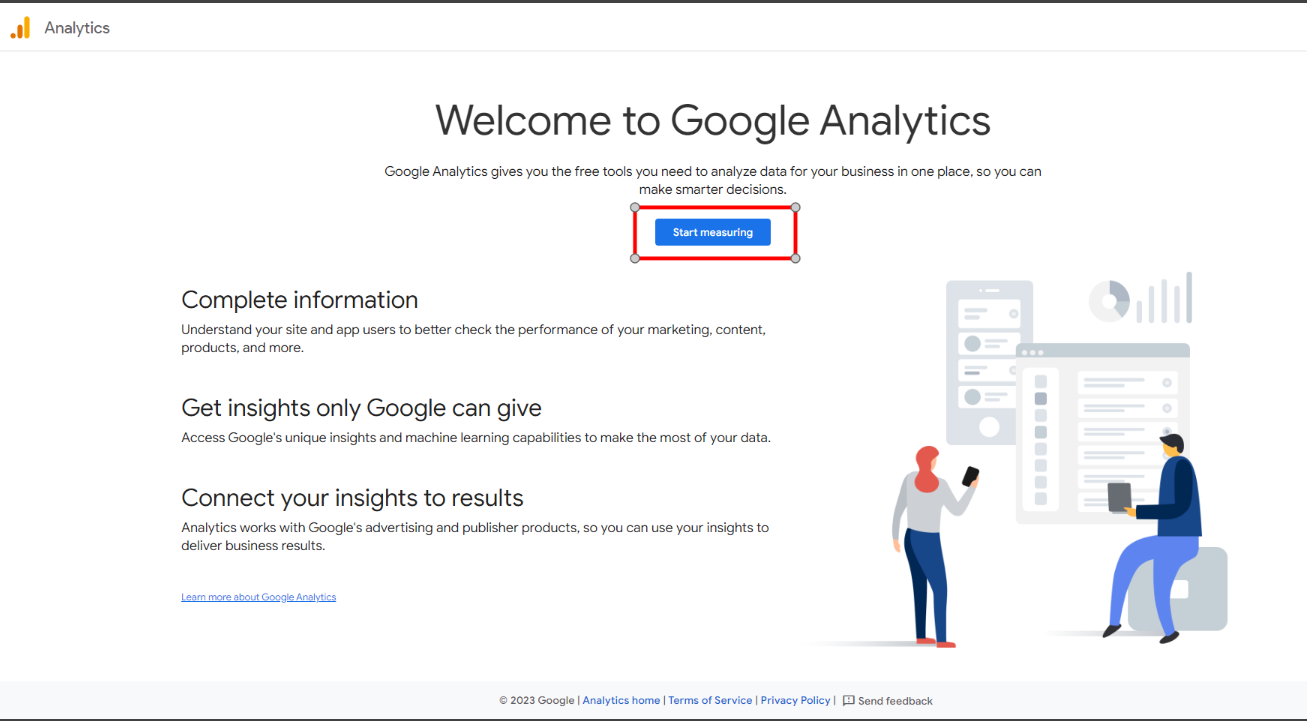
- Log in to your Google account and go to https://analytics.google.com/analytics/
- Click on the “Start Measuring” Button.
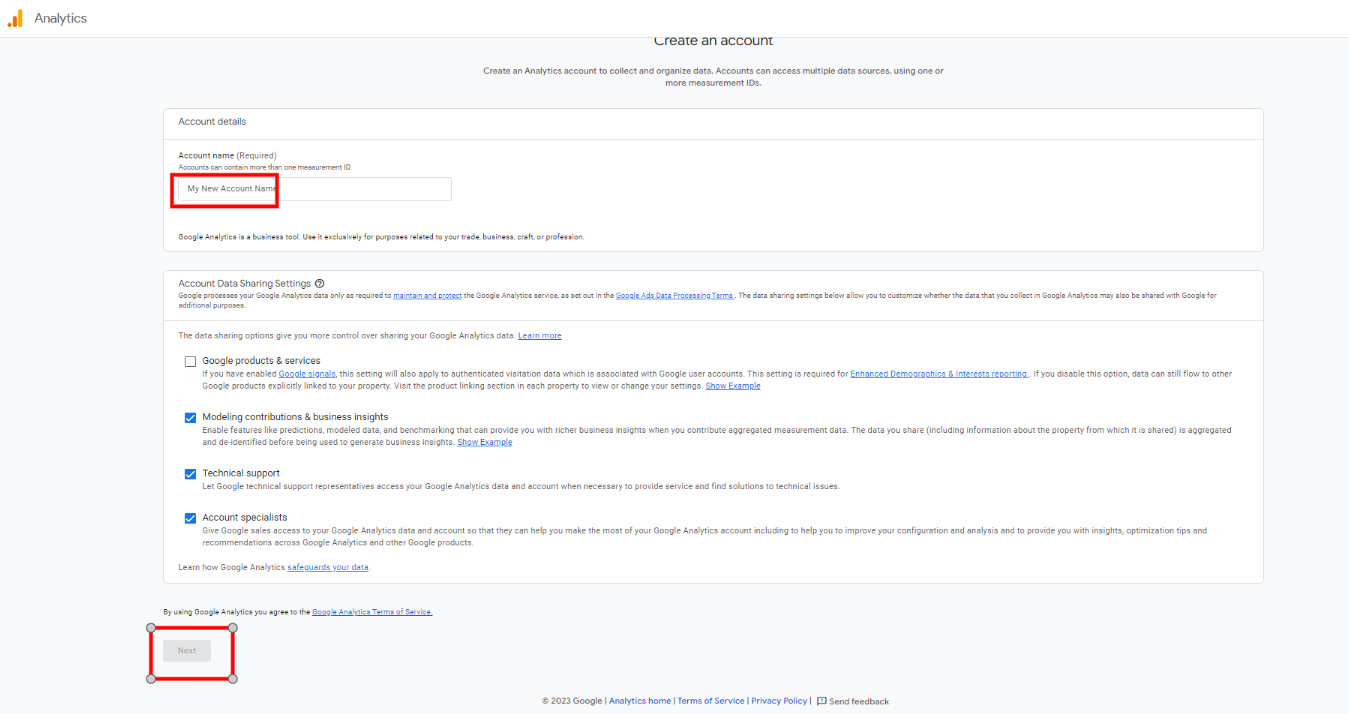
3. You will see the Account Setup screen.
Provide the website name as “Account Name” and then click on the “Next” tab.
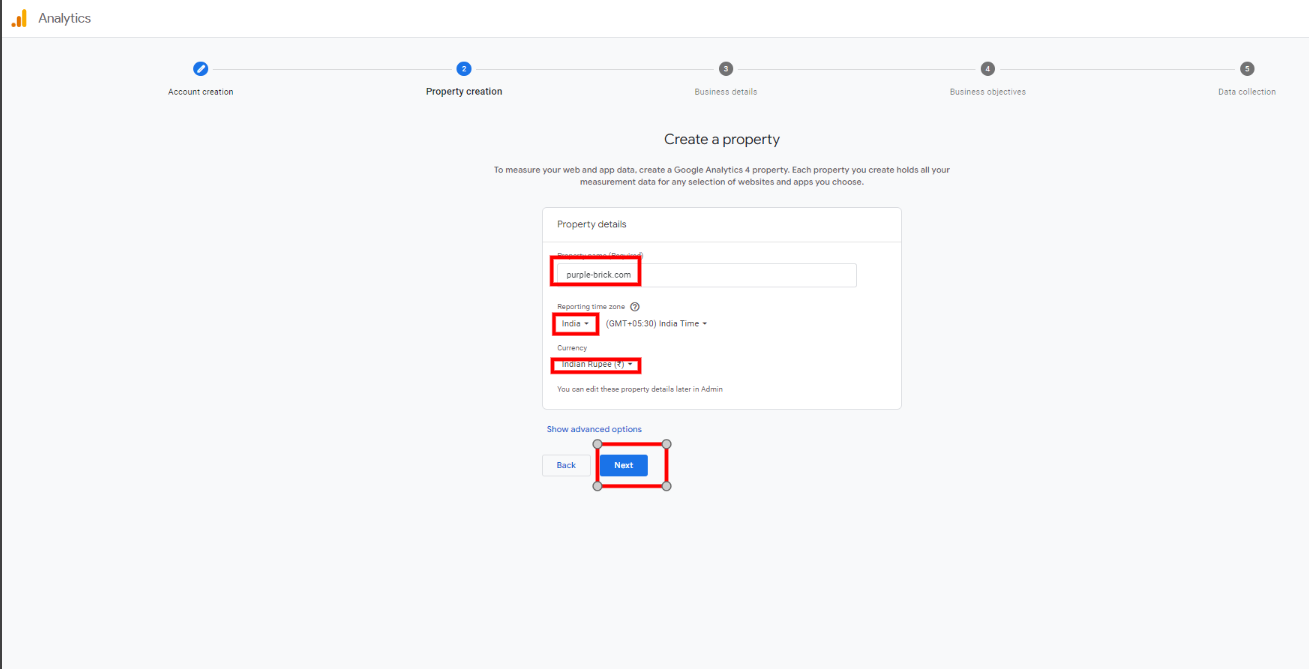
4. You will now see the property setup screen. Provide your website name as “Property Name” , select India as “Reporting Time Zone” and Indian Rupee as “Currency”.
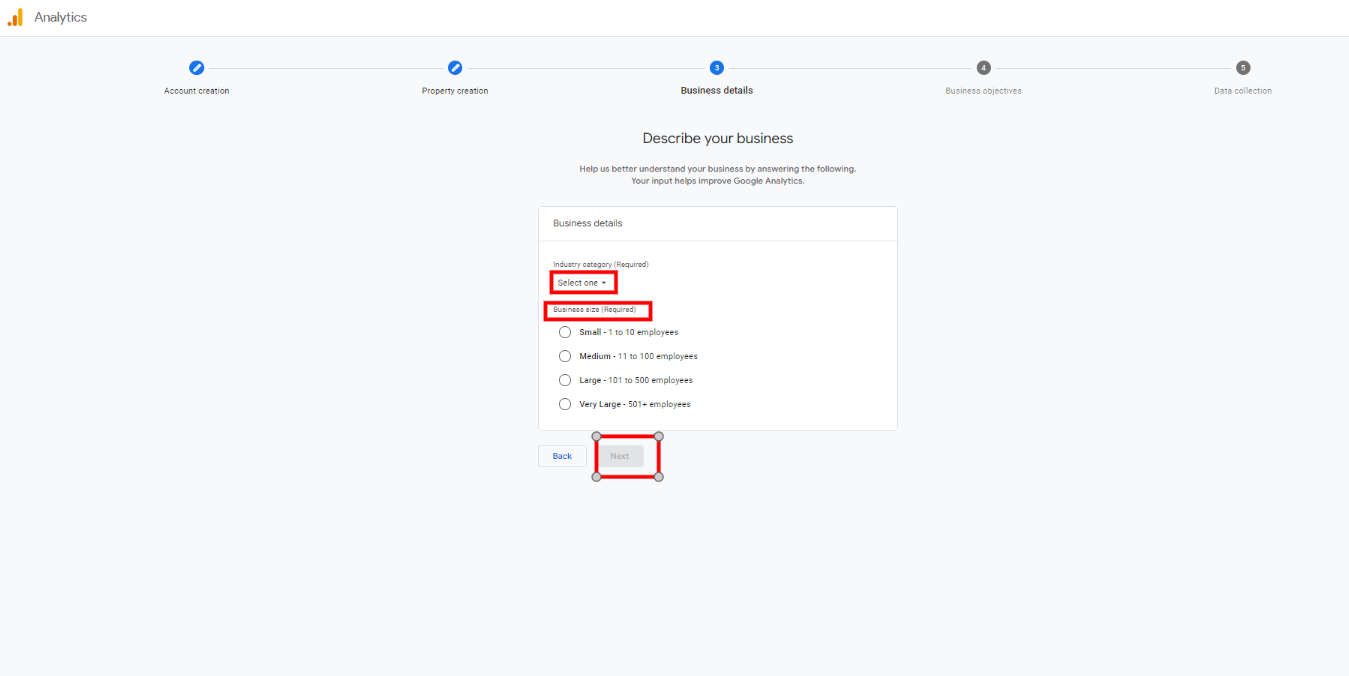
5. Provide the details “About Your Business” by selecting the option relevant to your business, such as Industry Category and Business size. Then click on the “create” button.
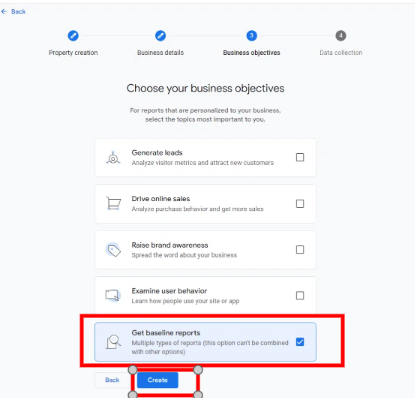
6. Now select the business objective “Get Baseline reports” and click Create.
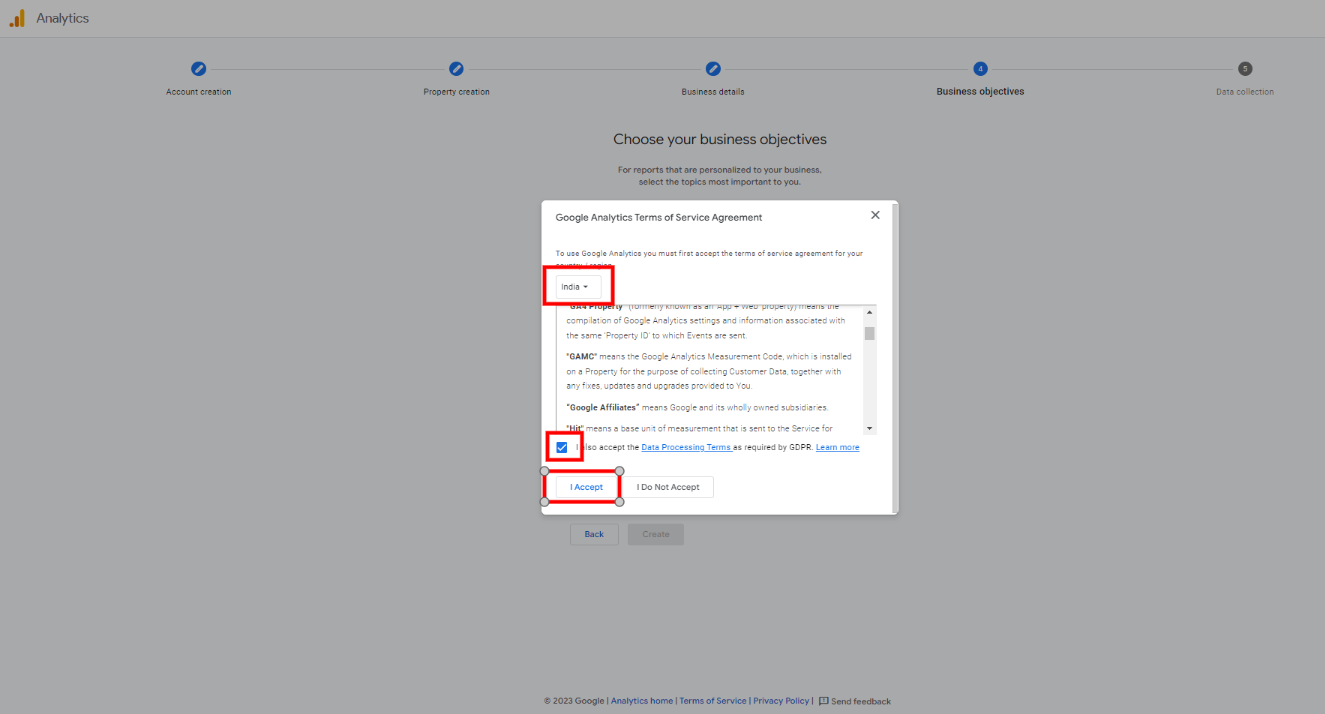
7. Once you click the Create button, the Google Analytics Terms of Service Agreement popup will appear, prompting you to accept their terms and conditions.
8. Select “Country” as India, and check the relevant boxes to accept the Data Processing Terms. Then click on “I Accept” button.
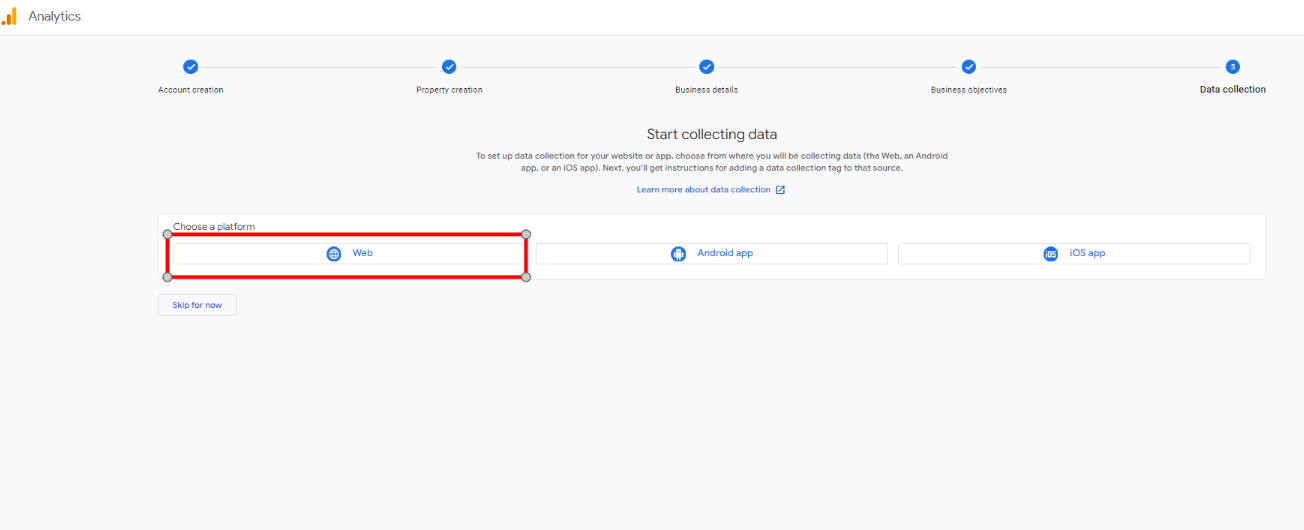
9. Now a new window will appear. Then select “Web”.
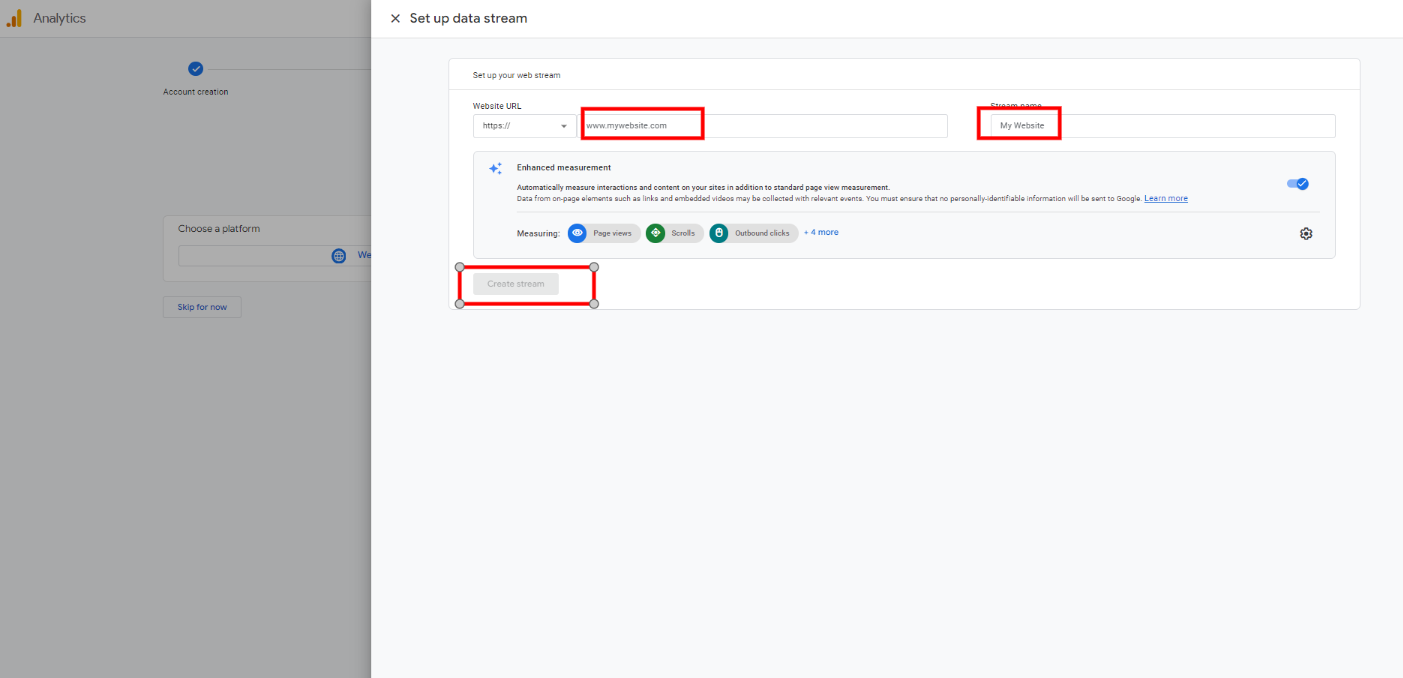
10. Set up the data stream by adding “Website address”, and the website name as “Stream” then click the Create Stream button.
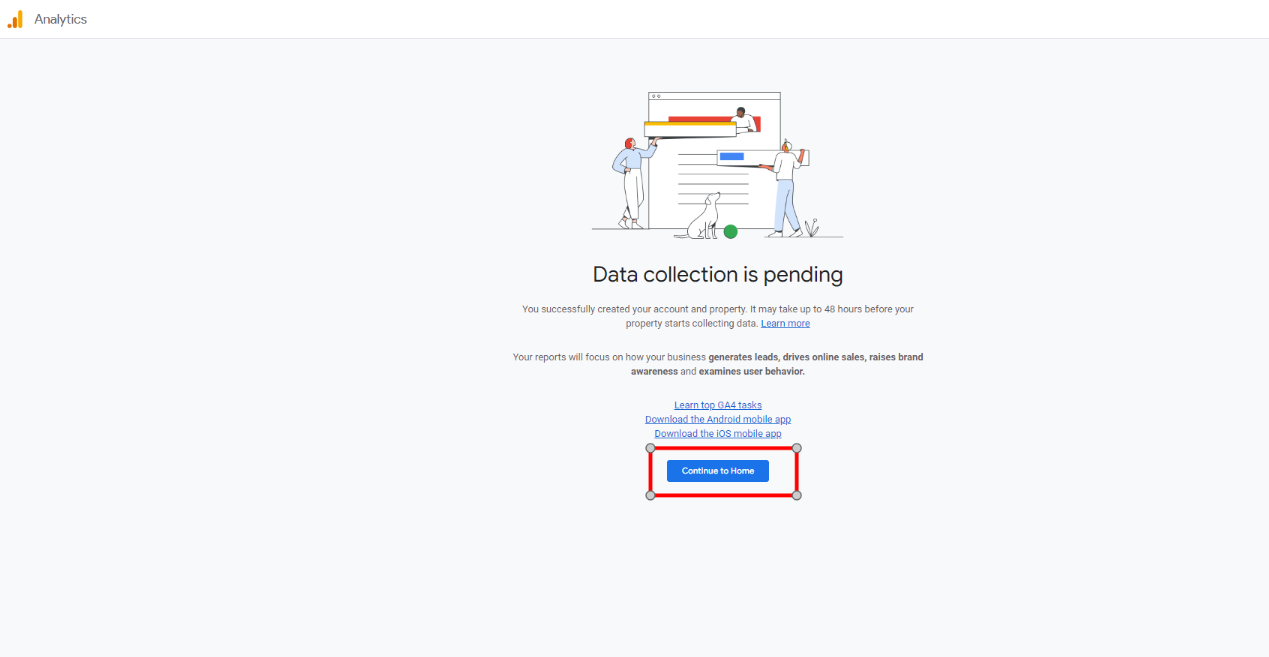
11. It will land you on the “Data collection” screen. Click on the “Continue to home” button.
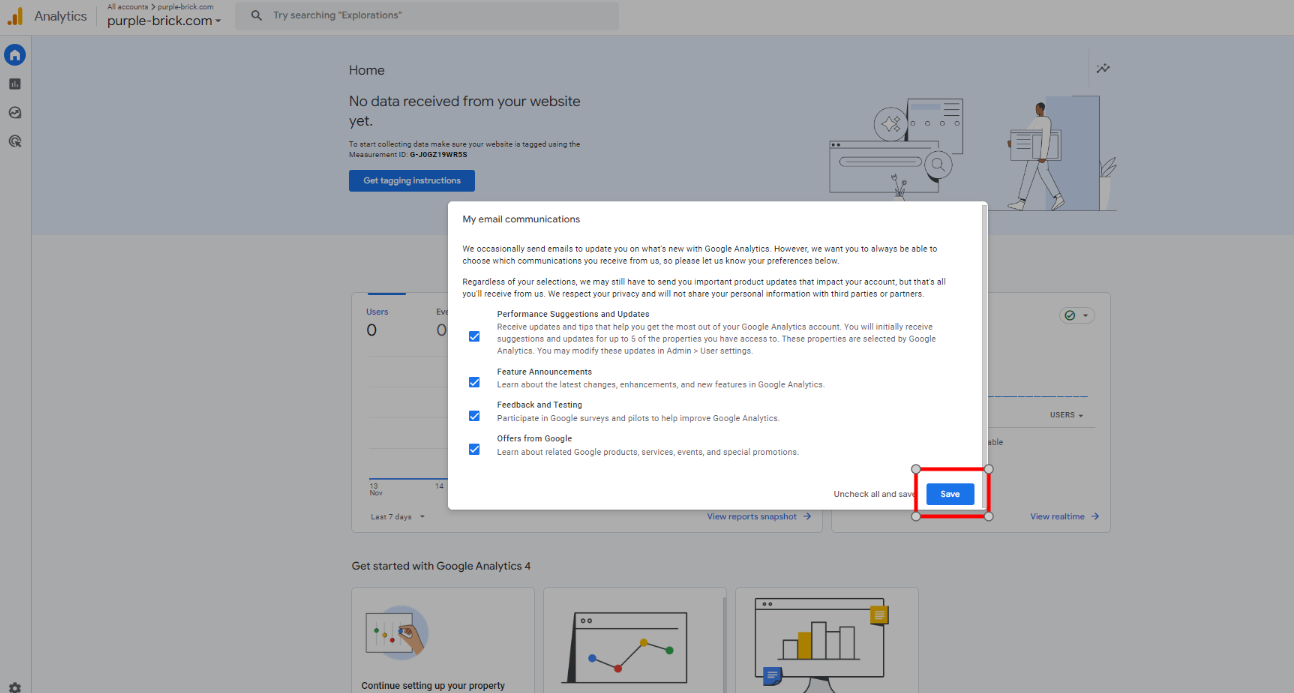
12. Now Click on the “Save” button.
Congrats!!! You have successfully made GA4.
Connect “GA4” to your WordPress Website
Install “Google Analytics” WordPress Plugin
- Go to your WordPress Dashboard.
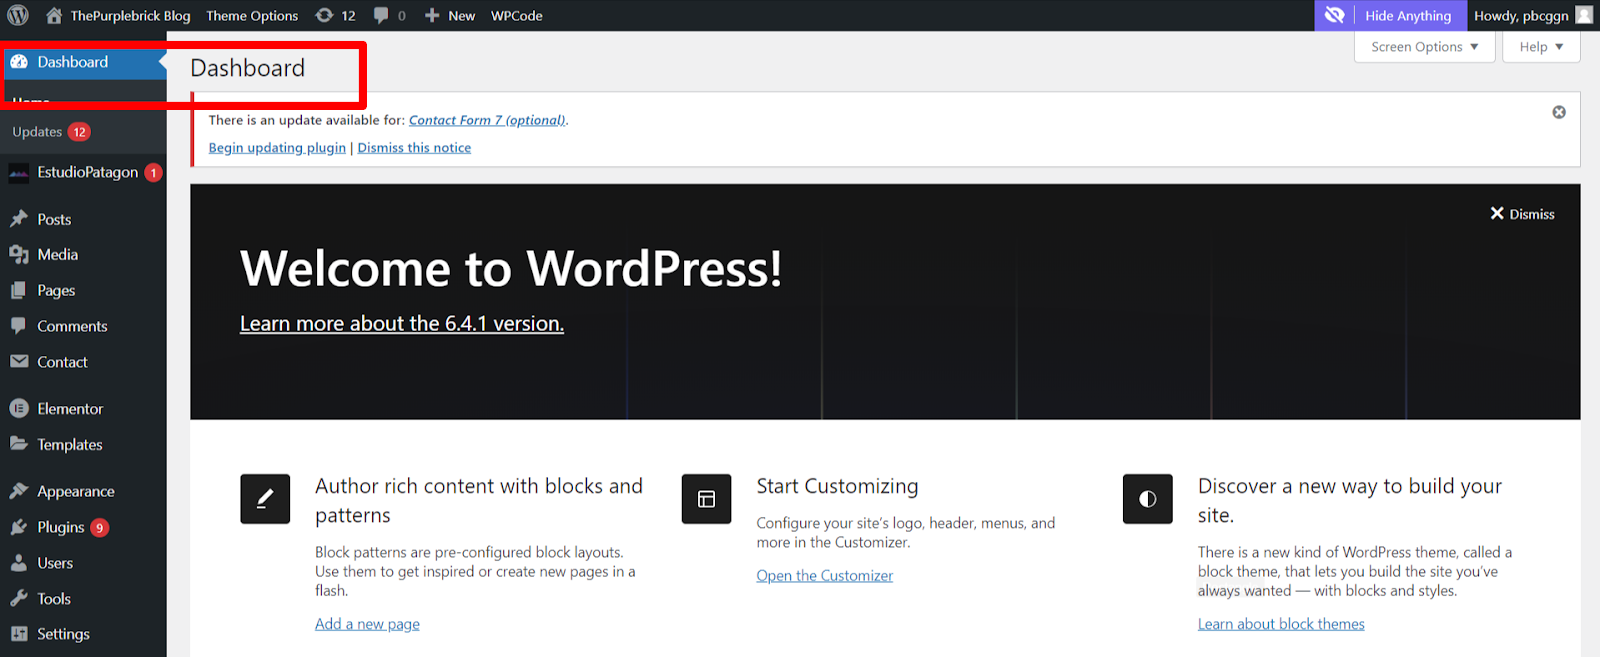
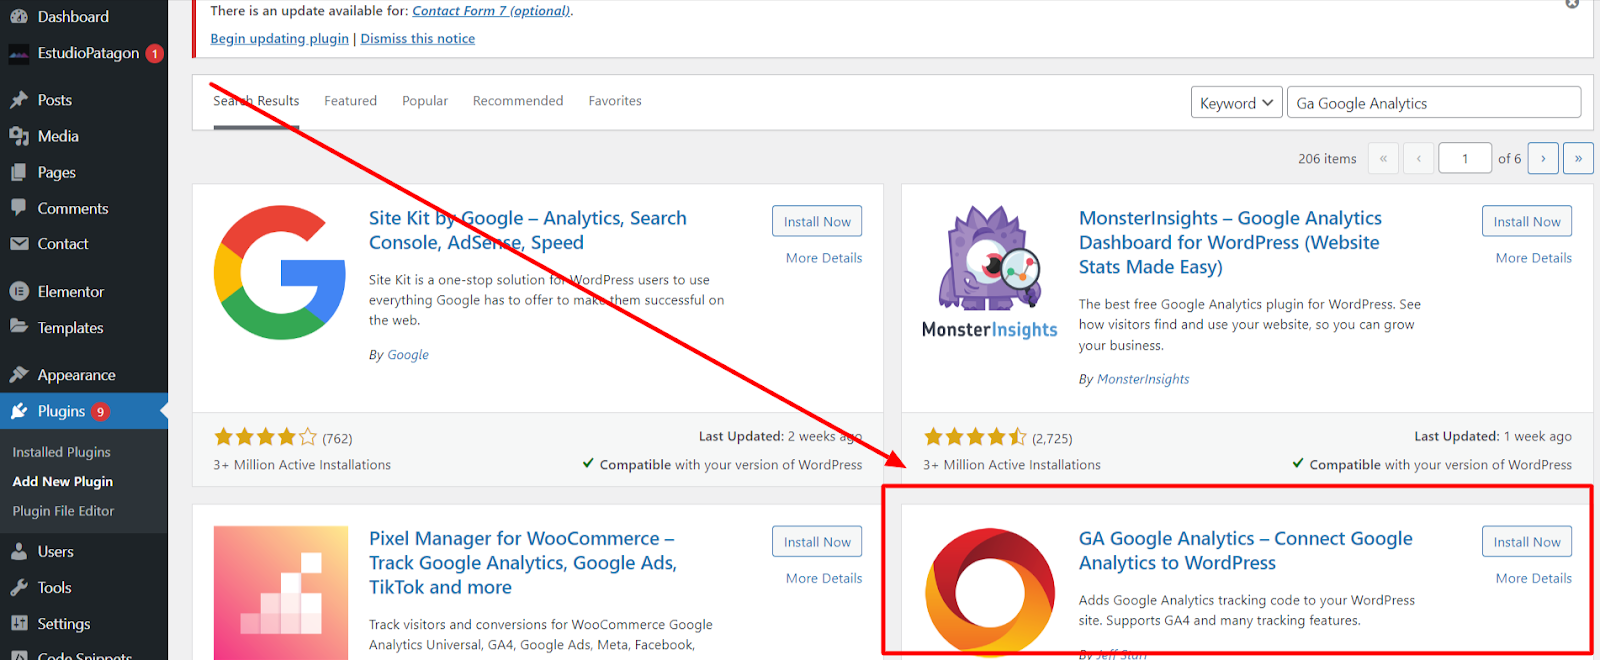
2. Click Plugins → Add New.
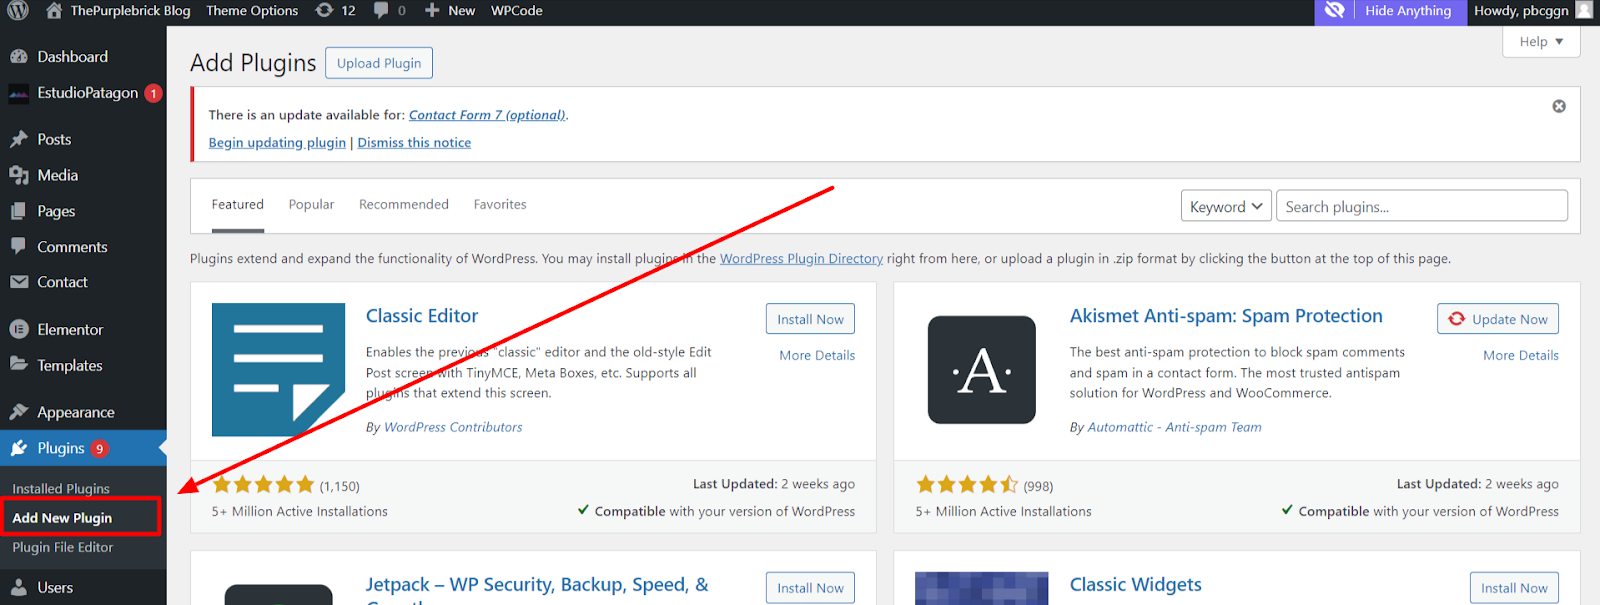
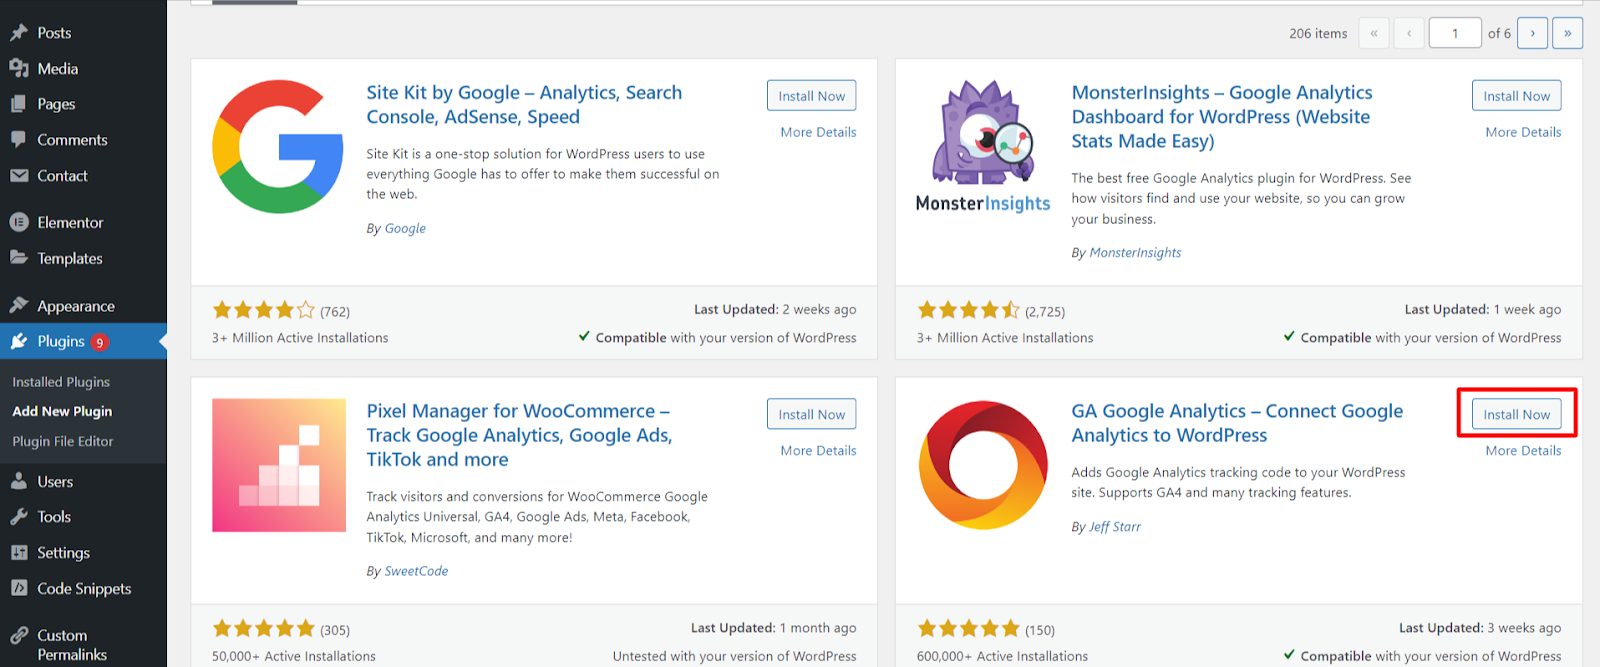
3. Type “GA Google Analytics” in the search box. Since the plugin supports GA4, it will integrate it with your WordPress site.
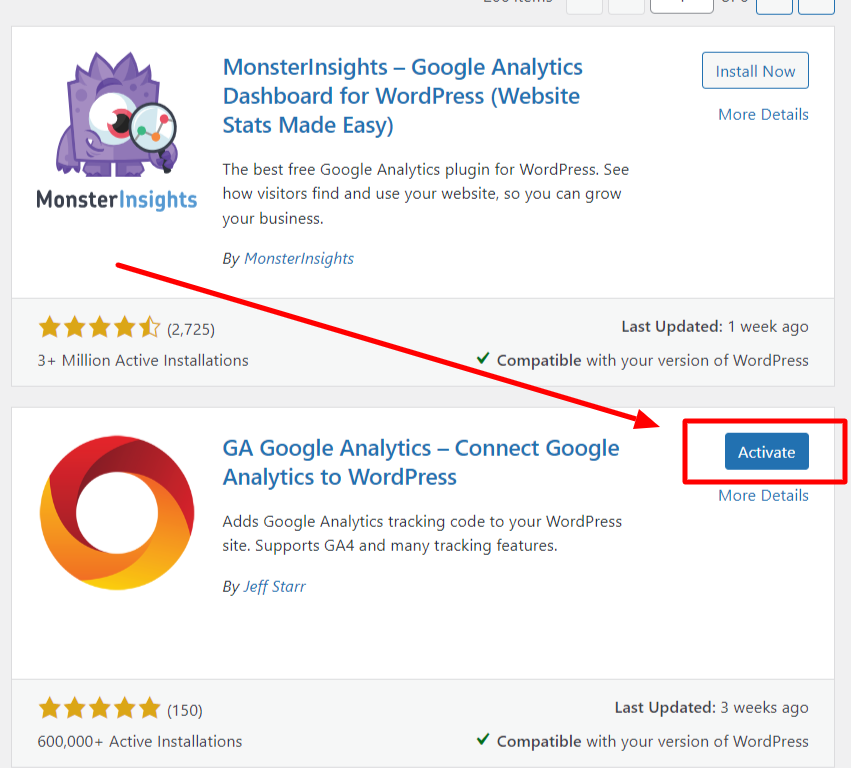
4. Click the “Install Now” button and then “Activate” the plugin.
Configure the plugin once it is activated.
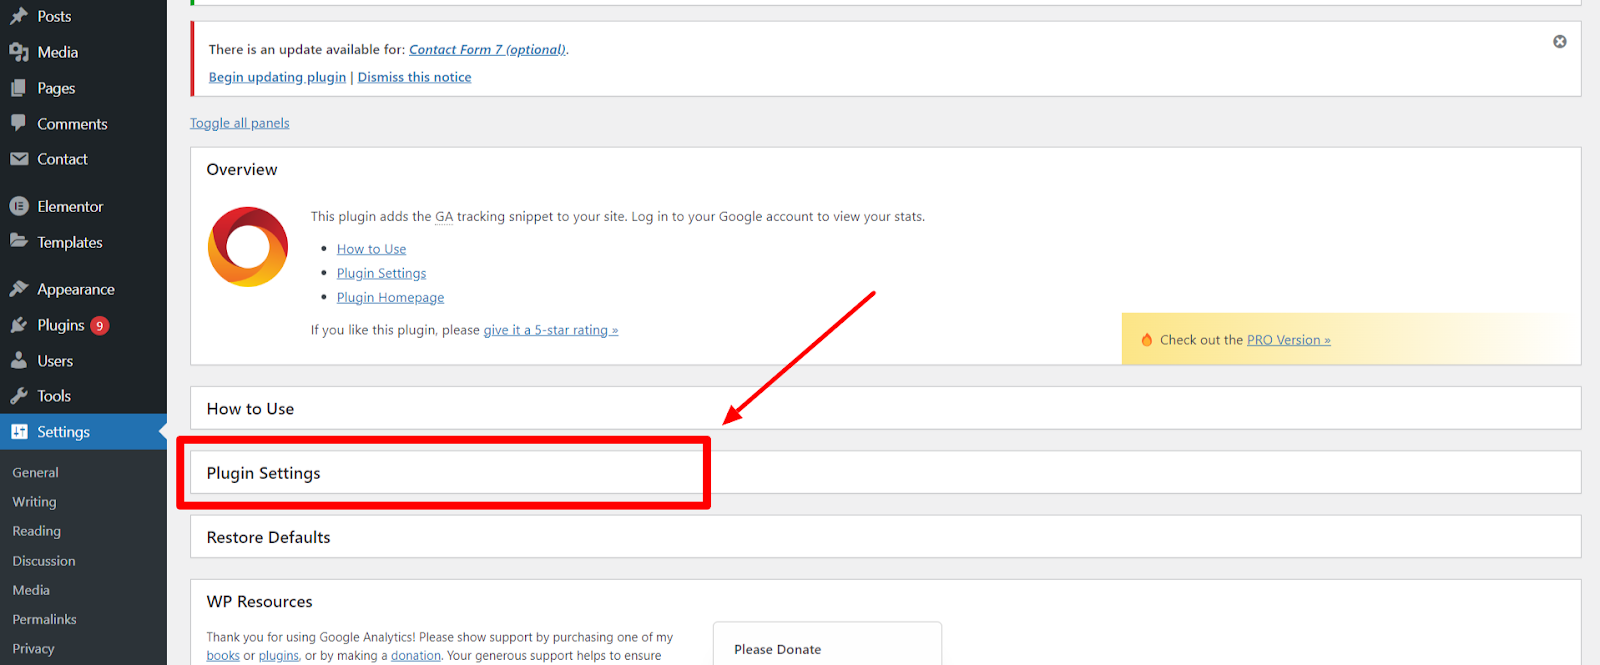
1. Go to Plugin → Installed Plugins → Settings
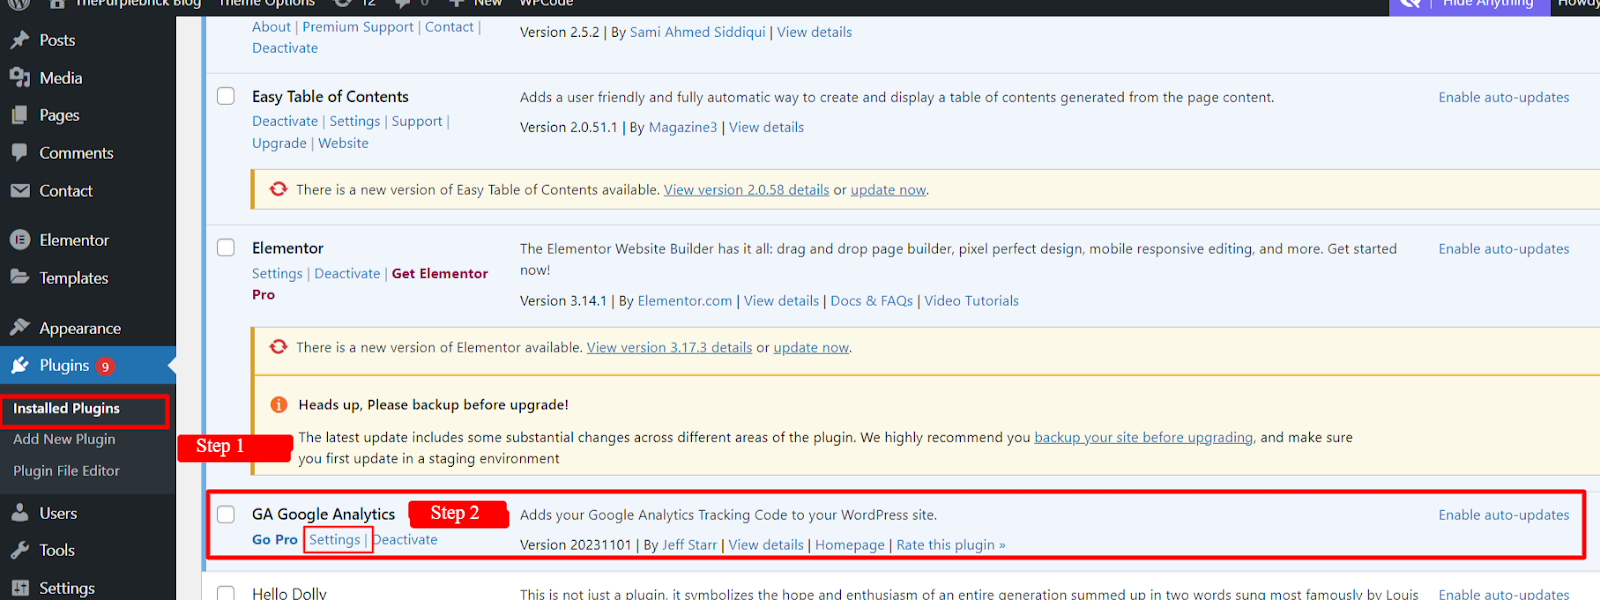
2. Visit the “Plugin Settings” panel
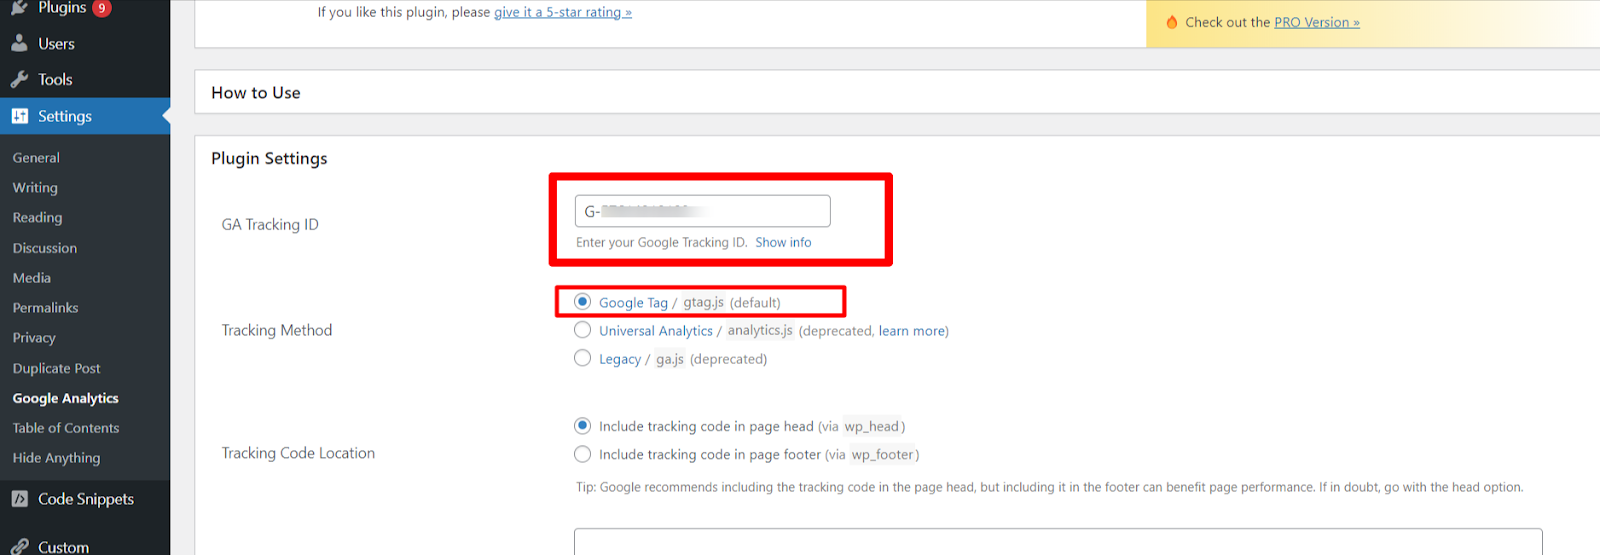
3. Copy and paste the “Tracking ID” you find on the “Google Analytics Tracking Code” page. (Note: Process of finding GA Tracking ID in GA4 has been explained below. Please check.)
- You must check the “Google Tag” and “Include tracking code in page head (via wp_head)” boxes that set up Google Analytics on the WordPress website.
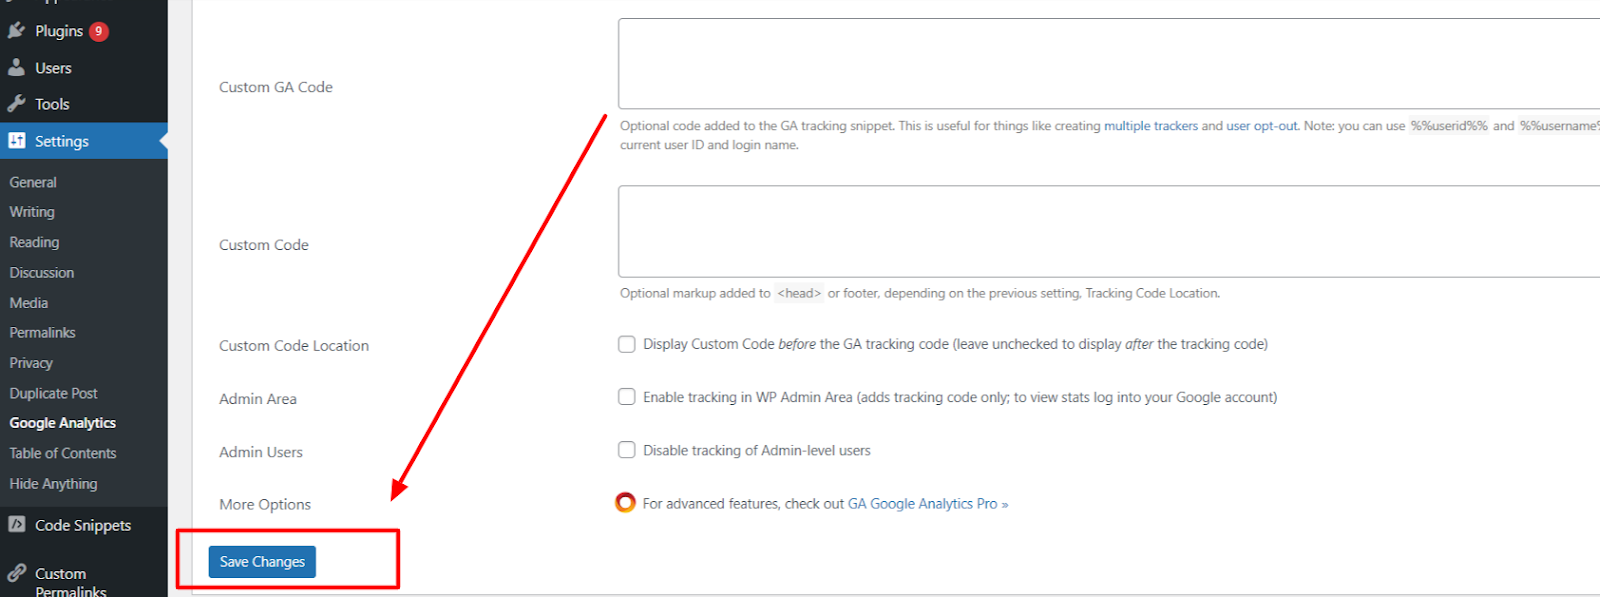
Click on “Save Changes”
4. Click the “Save Changes” button.
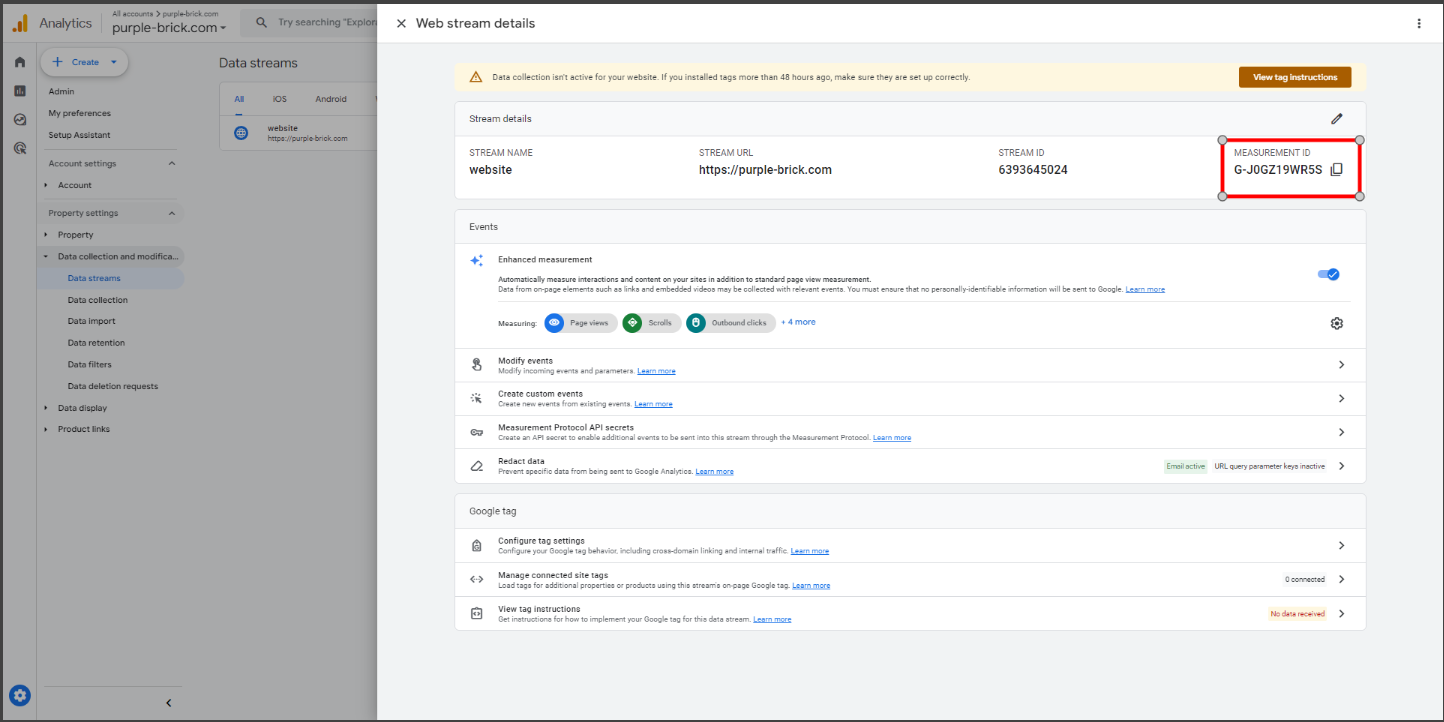
Process to find GA Tracking ID in GA4
- Login your GA4 account.
- Click on Setting then Data Stream option. Click on the website at last.
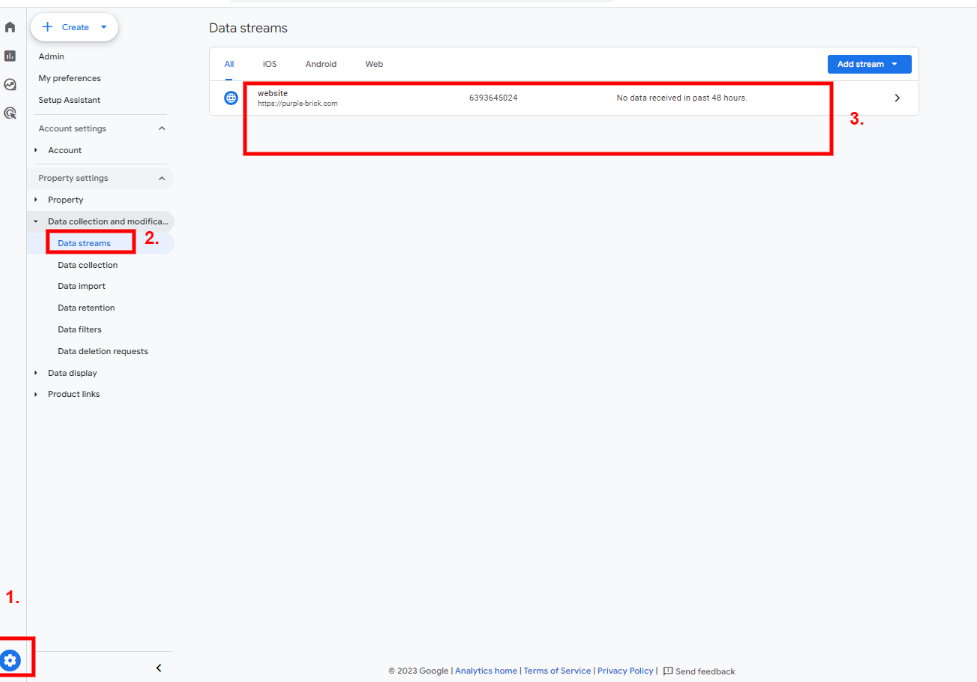
- A new window will appear. Copy the ID from the top right hand side.
Check Real-Time Traffic in GA4 to ensure it’s installed properly.
- Open any page on your website.
- Login to Google Account and then open GA4 account by clicking on the following link https://analytics.google.com/analytics/web
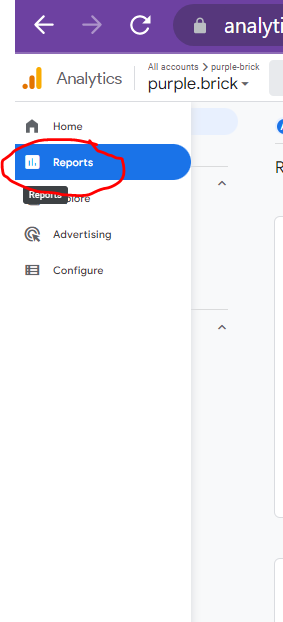
- Navigate to the Reports tab.
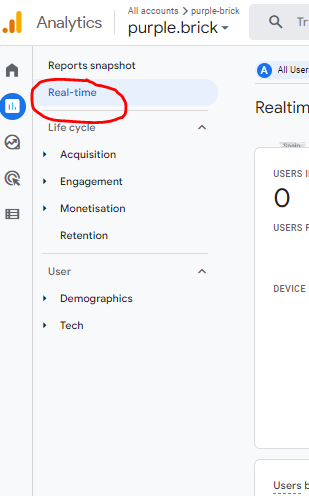
4. Then click on “Realtime”.
5. Go to “Page View” under “Event count by Event name” Card.
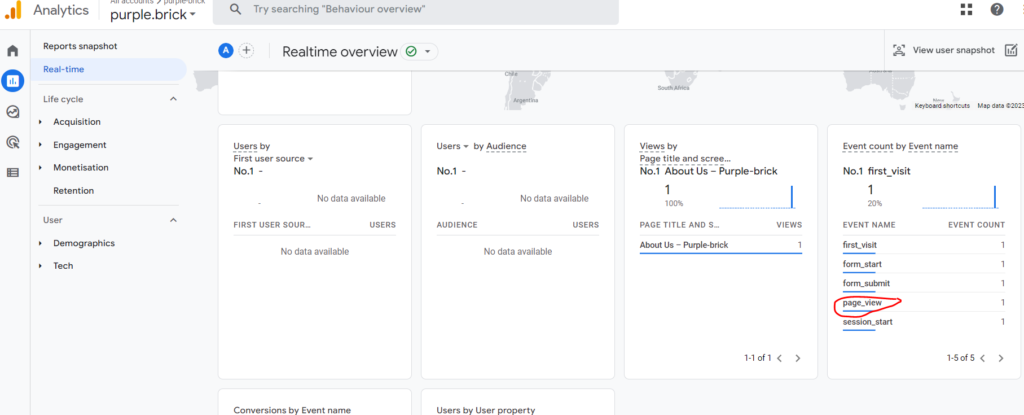
6. You will see different event parameters. Choose “Page-location”.
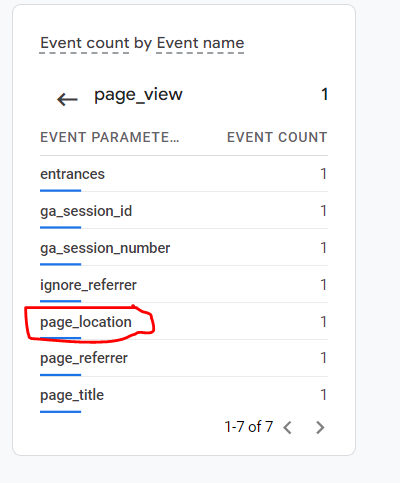
7. Now you can see the Page URL.

Note:
1. Check Real time Traffic for All Pages of your website.
2. GA4 takes a couple of minutes to show the data in Real Time Report.

Add a Comment
You must be logged in to post a comment